Vagrant+PHPStorm实现XDebug断点调试
时间:2022-01-20 17:31
下面由phpstorm教程栏目给大家介绍Vagrant+PHPStorm+Google+XDebug断点调试 ,希望对需要的朋友有所帮助!
1.登陆vagrant修改xdebug.ini配置
A.  登陆vagrant:vagrant ssh

B.  修改配置:sudo vim /etc/php/7.0/fpm/conf.d/20-xdebug.ini
      配置内容:
     zend_extension=xdebug.so
     xdebug.remote_enable = 1
     xdebug.remote_connect_back = 1
     xdebug.remote_port = 9001
     xdebug.max_nesting_level = 512
     xdebug.remote_host="192.168.10.10"
     xdebug.idekey = "PHPSTORM"
     xdebug.default_enable = 1
     xdebug.remote_enable = 1
     xdebug.remote_autostart = 1
     xdebug.remote_handler="dbgp"

  C.重启php: sudo service php7.0-fpm restart
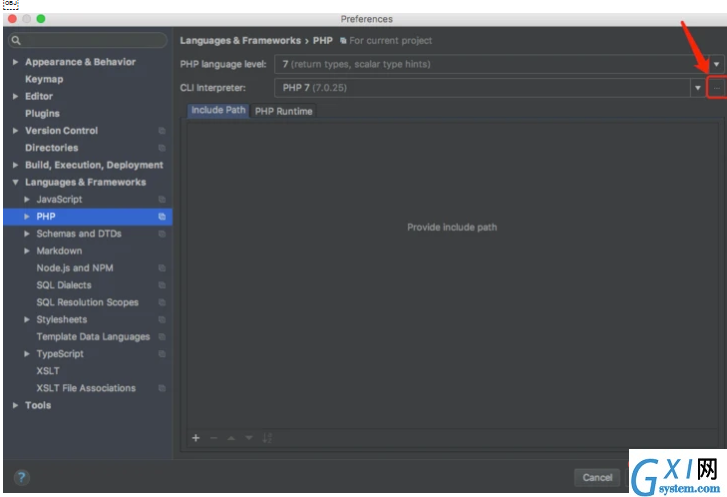
2.在PHPStorm->Preferences->Languages & Frameworks->PHP中箭头指向配置
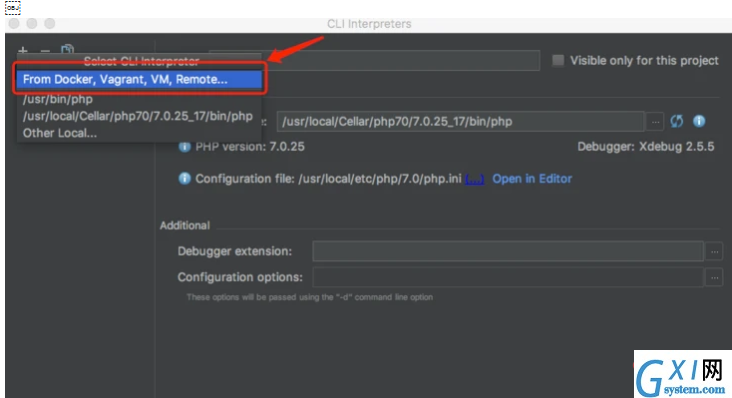
选择+,选择from vagrant
配置如下:

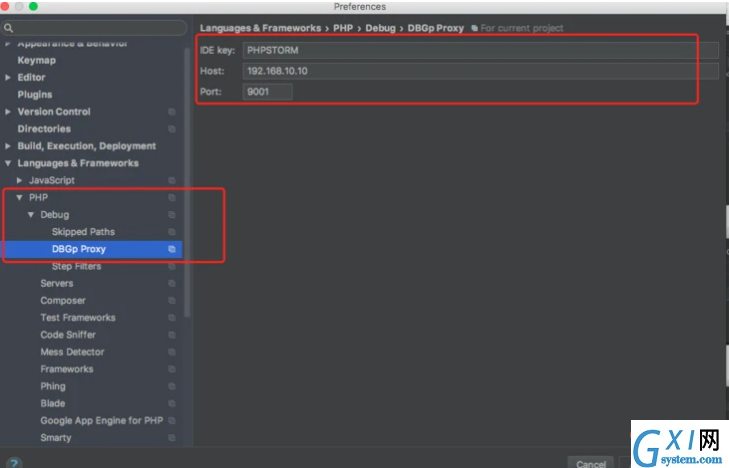
在PHP->Debug->DBGp Proxy设置如下

在PHP->Debug设置端口

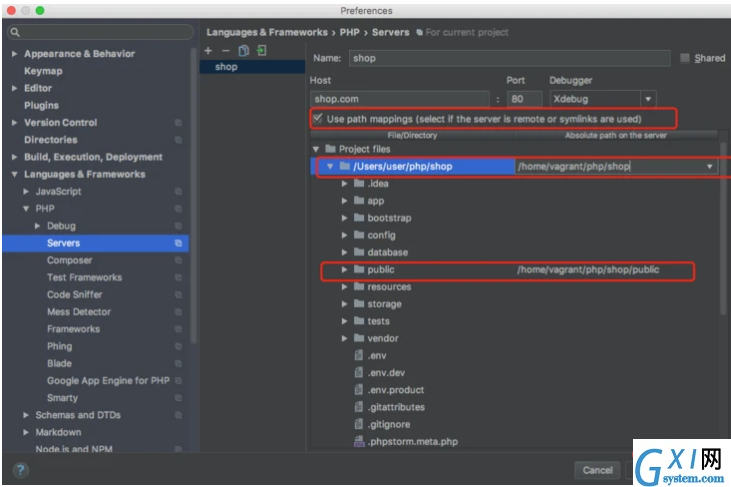
在PHP->Servers中设置映射路径

3.在google中下载Xdebug helper,并配置

备注:如果不能断点代表Xdebug和php版本不对应,可以将其他php版本的20-xdebug.ini都设置
以上就是Vagrant+PHPStorm实现XDebug断点调试的详细内容,更多请关注gxlsystem.com其它相关文章!


