索尼SRS-HG10与win7电脑连接和配对的步骤介绍
时间:2022-12-21 13:36
索尼SRS-HG10怎么与win7电脑连接和配对呢?下面就为大家带来了索尼SRS-HG10与win7电脑连接和配对的步骤介绍,我们不妨一起去看看哦。
索尼SRS-HG10与win7电脑连接和配对的步骤介绍
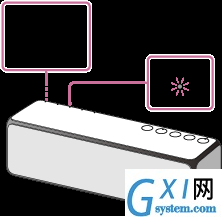
1、打开扬声器。
电源指示灯将以绿色点亮。
2、反复按FUNCTION按钮,直到BLUETOOTH指示灯闪烁。
扬声器进入BLUETOOTH模式。
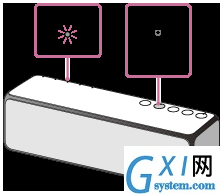
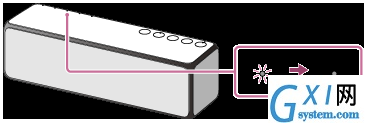
3、将扬声器设定为配对模式。
按住带指示灯的EXTRA BASS按钮/PAIRING按钮,直到听到语音指导,并且BLUETOOTH指示灯开始快速闪烁(每秒三次)。
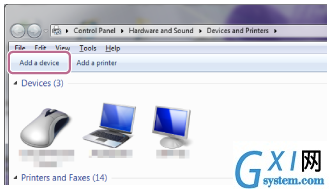
4、在PC上执行配对步骤。
1)、依次单击[Start]按钮和[Devices and Printers]。
2)、单击[Add a device]。
3)、单击[h.ear go 2],然后单击[Next]。
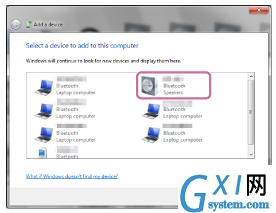
4)、当显示以下画面时,请单击[Close]。
PC的驱动程序安装开始。

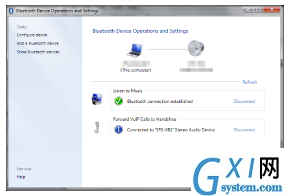
5)、双击[Devices]上的[h.ear go 2]。

6)、单击[Listen to Music]。

当建立了连接时,会显示勾选标记。
5、确认扬声器上的BLUETOOTH指示灯从闪烁变为保持点亮。
建立了BLUETOOTH连接时,BLUETOOTH指示灯将保持点亮。可以欣赏来自PC的音乐播放。
上文就是索尼SRS-HG10与win7电脑连接和配对的步骤介绍,希望可以帮助到你哦。


热门排行
今日推荐


热门手游
-
商场购物模拟器官方版

版本:v1.0.9
大小:46.11MB
日期:2024-12-16
-
滚动方块大冒险免费版

版本:v1.0.5
大小:26.10MB
日期:2024-12-16
-
恋恋奇缘体验服版

版本:v1.0.0
大小:131.33MB
日期:2024-12-16
-
炉石传说官方正版

版本:v1.0
大小:100.52MB
日期:2024-12-16
-
人群大师免费版

版本:v2.15.0
大小:57.68MB
日期:2024-12-16
-
方鸡跳跑单机版

版本:v1
大小:63.49MB
日期:2024-12-16