您的位置:首页 > 博客中心 > 数据库 >

Linux下php+mysql+nginx编译搭建(一)

时间:2022-03-14 02:15

之前一直都是一键搭建的web服务器,但是一键搭建的环境相对来说都是比较老的。如果要用比较新的环境,特别是正式服务器,就必须自己手动编译搭建了(以下搭建基于linux centos6.5 32位服务器)。

1、 nginx
版本:1.5
下载地址: http://nginx.org/download/nginx-1.5.2.tar.gz

2、 mysql
版本5.5
下载地址:http://downloads.mysql.com/archives/mysql-5.0/mysql-5.5.30.tar.gz

3、 php
版本5.4
下载地址:http://am1.php.net/get/php-5.4.34.tar.gz/from/this/mirror

一:安装nginx
安装一些依赖包:

yum -y install gcc gcc-c++ gcc-devel gcc-c++-devel ssl ssl-devel autoconf make aclocal libtool expat-devel libxml2-devel openssl openssl-devel zlib zlib-devel bzip2 bzip2-devel gd gd-devel libmcrypt libmcrypt-devel libXpm-devel  curl-devel libgd-devel gd-devel openldap-devel

进入一个目录:

cd /opt/

下载并解压:

wget http://nginx.org/download/nginx-1.5.2.tar.gz
  • tar -zxf nginx-1.5.2.tar.gz
  • wget http://labs.frickle.com/files/ngx_cache_purge-2.1.tar.gz
  • tar -zxf ngx_cache_purge-2.1.tar.gz
  • 进入目录并编译:

    cd nginx-1.5.2
  • ./configure --prefix=/usr/local/nginx --sbin-path=/usr/local/nginx/sbin/nginx --conf-path=/usr/local/nginx/conf/nginx.conf --error-log-path=/usr/local/nginx/log/error.log --http-log-path=/usr/local/nginx/log/access.log --pid-path=/usr/local/nginx/run/nginx.pid --user=www --group=www --with-http_ssl_module --with-http_flv_module --with-http_stub_status_module --with-http_gzip_static_module --http-client-body-temp-path=/usr/local/nginx/tmp/client --http-proxy-temp-path=/usr/local/nginx/tmp/proxy/ --http-fastcgi-temp-path=/usr/local/nginx/tmp/fcgi/ --add-module=../ngx_cache_purge-2.1 --with-pcre=../pcre-8.34
  • make && make install
  • 这样就完成了nginx的搭建。
    运行:/usr/local/nginx/sbin/nginx
    报错:nginx: [emerg] getpwnam("www") failed
    在nginx.conf中 把user nobody的注释去掉既可,改成www
    再次运行:/usr/local/nginx/sbin/nginx
    报错:nginx: [emerg] getpwnam("www") failed in /usr/local/nginx/conf/nginx.conf:1
    错误的原因是没有创建www这个用户,应该在服务器系统中添加www用户组和用户www,如下命令:

    groupadd -f www
  • useradd -g www www
  • 第三次运行:/usr/local/nginx/sbin/nginx
    报错:nginx: [emerg] mkdir() "/usr/local/nginx/tmp/client" failed (2: No such file or directory)
    执行:mkdir -p /usr/local/nginx/tmp/client
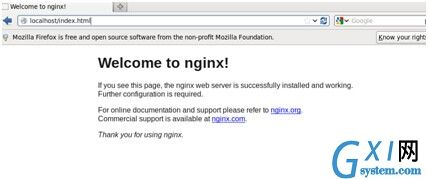
    然后localhost访问就可以看到:

    gxlsystem.com,布布扣

    习惯了了/etc/init.d/nginx start?觉得/usr/local/nginx/sbin/nginx 太长?
    Vim /etc/init.d/nginx

    #!/bin/bash
  • #
  • # Init file for nginx server daemon
  • #
  • # chkconfig: 234 99 99
  • # description: nginx server daemon
  • #
  • # source function library
  • . /etc/rc.d/init.d/functions
  • # pull in sysconfig settings
  • [ -f /etc/sysconfig/nginx ] && . /etc/sysconfig/nginx
  • RETVAL=0
  • prog="nginx"
  • PAT=/usr/local/nginx
  • NGINXD=/usr/local/nginx/sbin/nginx
  • PID_FILE=/usr/local/nginx/nginx.pid
  • start()
  • {
  • echo -n $"Starting $prog: "
  • $NGINXD 2>/dev/null $OPTIONS && success || failure
  • RETVAL=$?
  • [ "$RETVAL" = 0 ] && touch /var/lock/subsys/nginx
  • echo
  • }
  • stop()
  • {
  • echo -n $"Shutting down $prog: "
  • killproc nginx
  • RETVAL=$?
  • echo
  • [ $RETVAL -eq 0 ] && rm -f /var/lock/subsys/nginx
  • return $RETVAL
  • }
  • reload()
  • {
  • echo -n $"Reloading nginx: "
  • killproc nginx -HUP
  • RETVAL=$?
  • echo
  • return $RETVAL
  • }
  • case "$1" in
  • "start")
  • start
  • ;;
  • "stop")
  • stop
  • ;;
  • "restart")
  • stop
  • start
  • ;;
  • "reload")
  • reload
  • ;;
  • "status")
  • status -p $PID_FILE nginx
  • RETVAL=$?
  • ;;
  • *)
  •  
  • echo $"Usage: $0 {start|stop|restart|reload|status}"
  • RETVAL=1
  • esac
  • exit $RETVAL
  • 保存,添加x权限。
    如需开机启动:
    chkconfig nginx on


    更多请支持:

    热门排行

    今日推荐

    热门手游