vuex在vue3的用法是什么
时间:2022-03-10 10:01
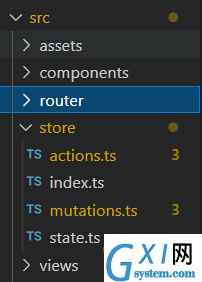
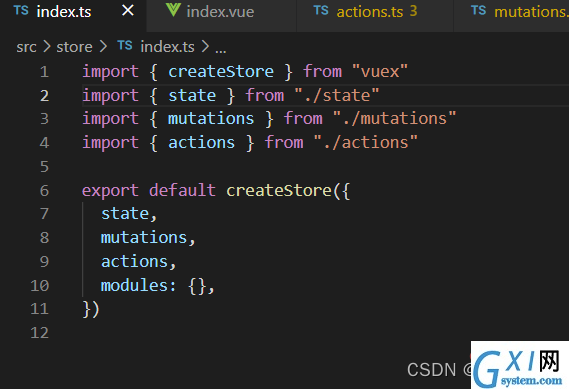
在vue3中,vuex用于储存和管理所有组件的状态,是专为“vue.js”应用程序开发的状态管理模式;可以利用mutations可以改变vuex中的数据,对于异步的情况,可用actions提交mutations中的方法改变vuex中的数据。 本文操作环境:windows10系统、Vue3版,DELL G3电脑。 Vuex 是一个专为 Vue.js 应用程序开发的状态管理模式 + 库。它采用集中式存储管理应用的所有组件的状态,并以相应的规则保证状态以一种可预测的方式发生变化。 vuex在中大型项目中的应用十分广泛,通常会把全局都用到的数据放在vuex中,方便其他页面进行使用,在项目中,vuex中存放的数据大部分与user_id,权限等信息相关,那么在vue3中该怎么使用vuex呢?带着这个问题,在本篇文章中,咱们一起分析下 其实vue3中使用vuex和vue2使用vuex大体相同,都是通过state存放数据,通过mutations去改变vuex中的数据,对于异步的情况,通过actions提交mutations中的方法进而改变vuex中的数据,带着这个思路咱们一起使用下vue3中的vuex 在开始写代码之前,先来看下我的目录结构:在store文件下,将vuex分为了如下几个ts文件 在index.ts中,将这几个模块暴露出来的方法赋值给对应的模块 1、如何使用vuex中存放的数据 state和vue2一样,都是存放数据的地方,写法上也一模一样,这里我定义了一个count属性,初始化为0 这时我们在vue3中的使用方法如下:首先从vuex中引入useStore函数,他的返回值就是一个vuex实例 在控制台中,打印这个store可以看到store上的一些属性,很明显他就是一个vuex的实例,它具有getter,dispatch,state等属性 2. 如何改变vuex中的属性 vue3和vue2一样,都是通过提交mutations中的方法,进行对vuex中数据的改变,那具体该如何使用呢?首先看一下mutations中的写法 这里,定义了一个addCount方法,这个方法接受两个参数,第一个参数是要改变的state对象(当然你调用这个放法的传参中也可以写state.count,然后再mutations中直接state += payload就可以了),第二个参数是要改变的数据,比如进行 +1 操作 3、 如何异步改变vuex的数据 在vue2中actions通过dispach -> mutations中的方法来实现的,在vue3中也是如此,但是需要注意的是,vue3中actions的第一个参数是固定的,是当前vuex的实例,是不需要你进行传递的,第二个参数是将要进行操作的数据,在此,笔者使用 +2操作 效果图: 1、初始: 2、点击 【改变vuex数据】按钮: 3、 点击【异步改变vuex数据】(在一秒之后发生变化) 【相关推荐:《vue.js教程》】 以上就是vuex在vue3的用法是什么的详细内容,更多请关注gxlsystem.com其它相关文章!
vuex在vue3的用法是什么
const state = {
  count: 0,
}
export { state }<template>
<h1>vuex中的数据{{ store.state.count }}</h1>
</template>
<script lang="ts">
import { defineComponent } from "vue"
import { useStore } from "vuex"
export default defineComponent({
name: "index",
setup() {
const store = useStore()
return { store }
},
})
</script>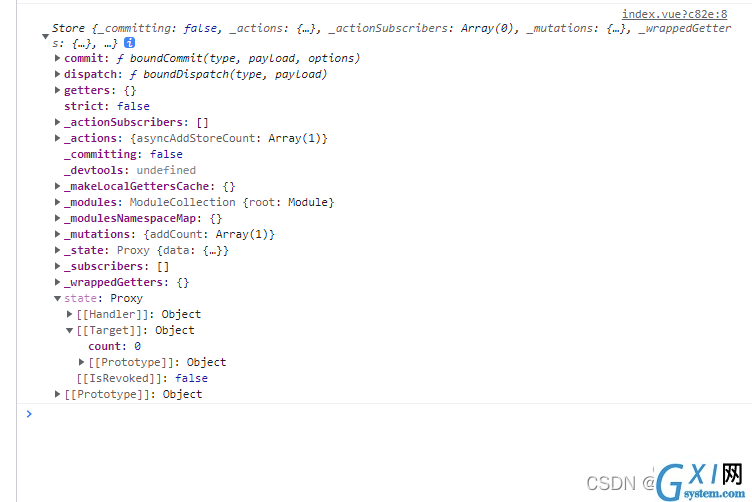
const mutations = {
  addCount(state, payload) {
    state.count += payload
  },
}
export { mutations }<template>
<h1>vuex中的数据{{ store.state.count }}</h1>
<button @click="changeStoreCount">改变vuex数据</button>
</template>
<script lang="ts">
import { defineComponent } from "vue"
import { useStore } from "vuex"
export default defineComponent({
name: "index",
setup() {
const store = useStore()
console.log(store)
const changeStoreCount = () => {
// 在这里提交了mutations中的addCount方法
store.commit("addCount", 1)
}
return { store, changeStoreCount }
},
})
</script>
<style scoped></style>const actions = {
asyncAddStoreCount(store, payload) { // 第一个参数是vuex固定的参数,不需要手动去传递
store.commit("addCount", payload)
},
}
export { actions }<template>
<h1>vuex中的数据{{ store.state.count }}</h1>
<button @click="changeStoreCount">改变vuex数据</button>
<button @click="asyncChangeStoreCount">异步改变vuex数据</button>
</template>
<script lang="ts">
import { defineComponent } from "vue"
import { useStore } from "vuex"
export default defineComponent({
name: "index",
setup() {
const store = useStore()
console.log(store)
const changeStoreCount = () => {
store.commit("addCount", 1)
}
const asyncChangeStoreCount = () => {
setTimeout(() => {
// asyncAddStoreCount是mutations中的方法,2是传递过去的数据
// 异步改变vuex用dispatch方法,这里用setTimeout模拟异步操作
store.dispatch("asyncAddStoreCount", 2)
}, 1000)
}
return { store, changeStoreCount, asyncChangeStoreCount }
},
})
</script>
<style scoped></style>


热门排行
今日推荐


热门手游
-
驾驶摩托车传奇官方版

版本:v1.0
大小:141.15MB
日期:2025-05-20
-
森久城物语破解版

版本:v1.1.1
大小:649.58MB
日期:2025-05-20
-
大肠的复仇破解版

版本:v1.2
大小:98.04MB
日期:2025-05-20
-
F1方程式赛车无限制版

版本:v3.74
大小:331.68MB
日期:2025-05-20
-
模拟驾驶真实路安卓版

版本:v3.11.8
大小:105.30MB
日期:2025-05-20
-
幻想名将录无限制版

版本:v1.0.0
大小:148.06MB
日期:2025-05-20