UC浏览器中恢复书签数据的详细步骤
时间:2023-03-16 01:54
UC浏览器怎么恢复书签数据?这期教程是为各位讲解在UC浏览器中恢复书签数据的详细步骤,感兴趣的就赶紧去下文学习下吧,相信你们会喜欢。
UC浏览器中恢复书签数据的详细步骤

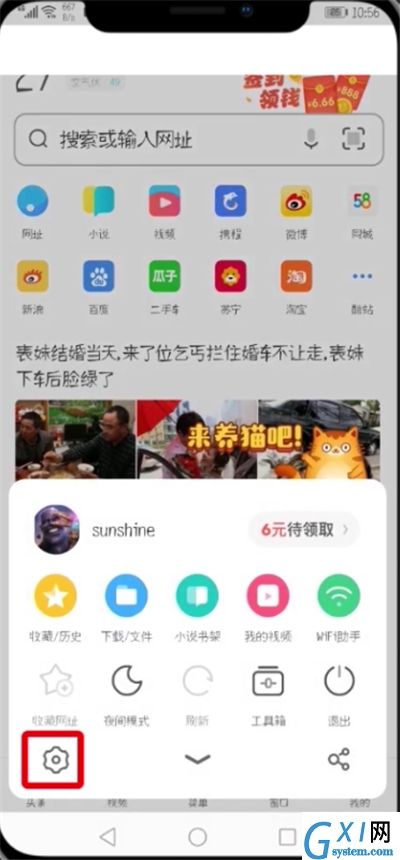
1、打开UC浏览器,点击“菜单”

2、点击“设置”
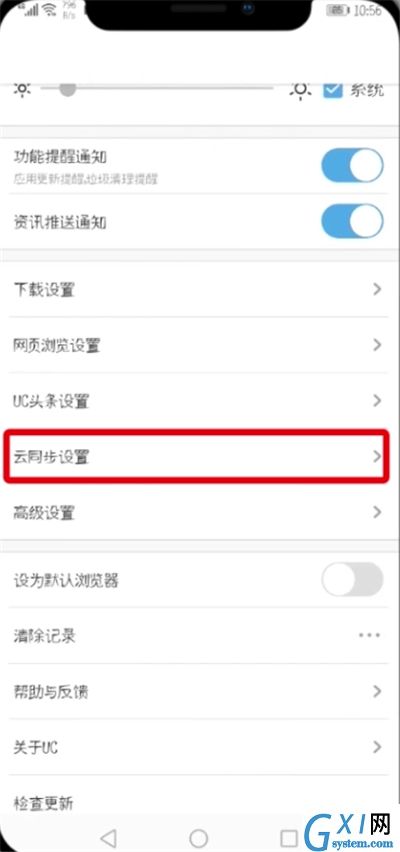
3、点击“云同步设置”
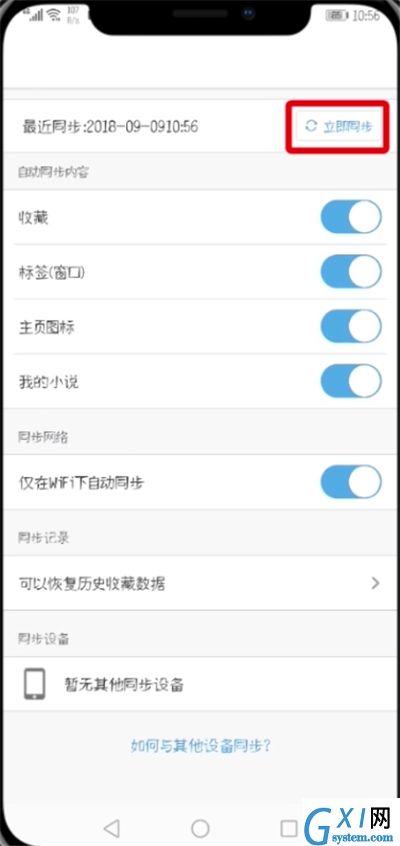
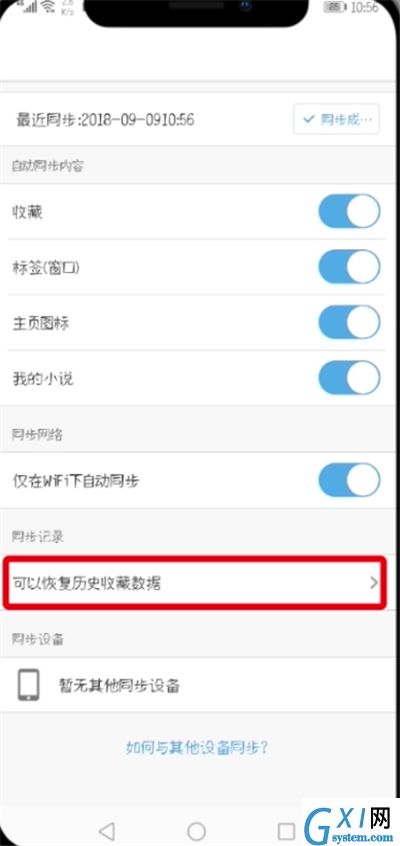
4、点击“立即同步”,然后点击“恢复历史收藏数据”
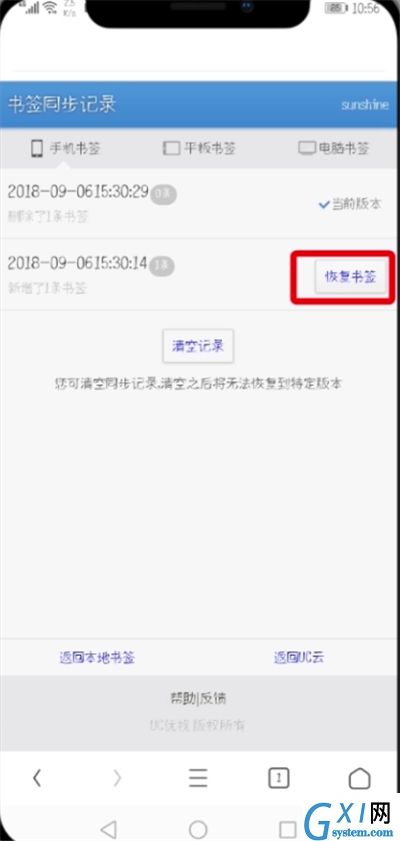
5、点击“恢复书签”即可
以上就是小编为大家带来的UC浏览器怎么恢复书签数据操作方法,更多精彩教程尽在Gxl网!


热门排行
今日推荐


热门手游
-
商场购物模拟器官方版

版本:v1.0.9
大小:46.11MB
日期:2024-12-16
-
滚动方块大冒险免费版

版本:v1.0.5
大小:26.10MB
日期:2024-12-16
-
恋恋奇缘体验服版

版本:v1.0.0
大小:131.33MB
日期:2024-12-16
-
炉石传说官方正版

版本:v1.0
大小:100.52MB
日期:2024-12-16
-
人群大师免费版

版本:v2.15.0
大小:57.68MB
日期:2024-12-16
-
方鸡跳跑单机版

版本:v1
大小:63.49MB
日期:2024-12-16