Excel表格制作单轴气泡图的操作流程
时间:2022-10-26 13:11
有许多小伙伴还不熟悉Excel这款应用,而本章节主要介绍了Excel表格制作单轴气泡图的操作流程,还不会操作的朋友就跟着小编学习一下吧,希望对你们有所帮助。
Excel表格制作单轴气泡图的操作流程
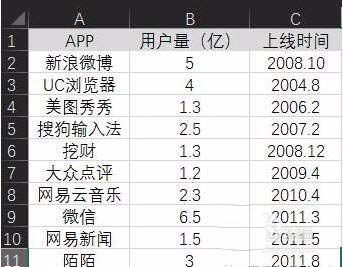
1、先准备原始数据两组,因为具有两个数据维度,所以数据准备两组。
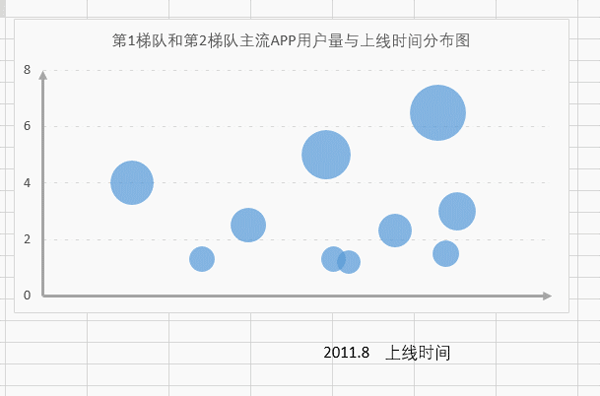
2、在工具栏中找到“插入”-“图表”-“插入的图表”,在展开菜单中选择XY散点图。
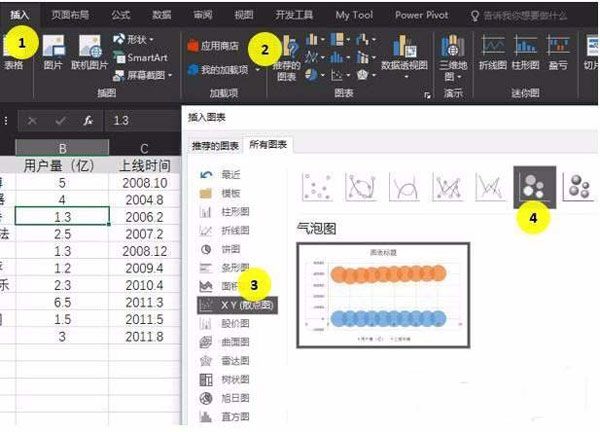
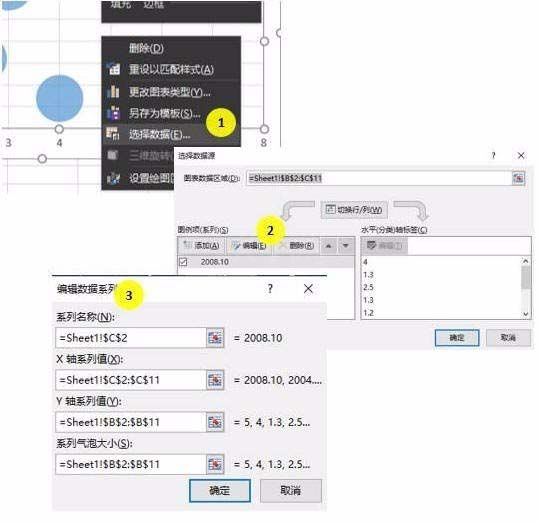
3、图表设置:自动生成的图表,把横轴和纵轴的位置是相反的,同时代表气泡面积的数据也默认为同一个数值。在X轴系列值选择上线时间列数据,Y轴系列值选择用户量列数据,系列气泡大小同样选择用户量列数据。
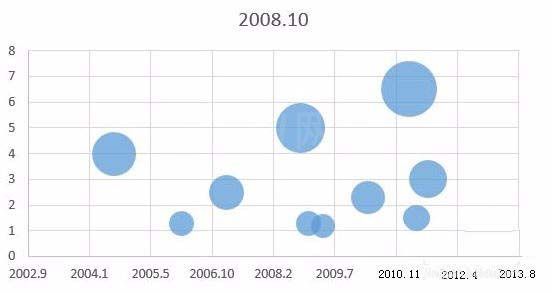
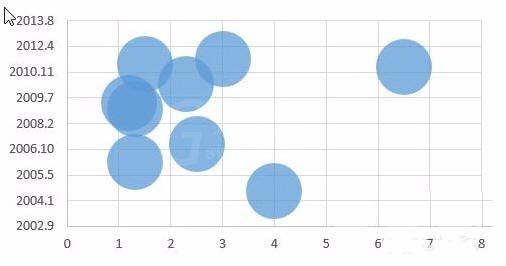
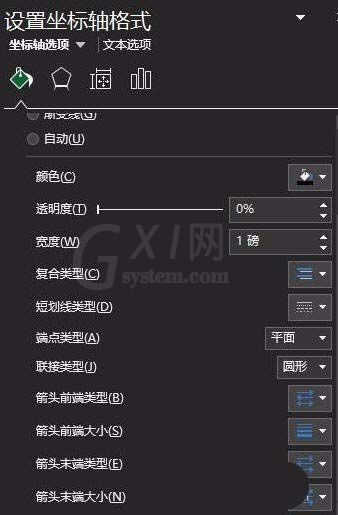
4、坐标轴格式调整:纵坐标格式:最大值:8;最小值:0;主要单位:2;坐标轴颜色:灰色。坐标轴末端箭头:通过箭头类型和大小调节,会得到第二副图的效果。
5、插入文本框,放起始时间和结束时间和“上线时间”的字样。在文本框输入文本之后,选择文本框,然后Ctrl+C,然后选择图表,再Ctrl+V。
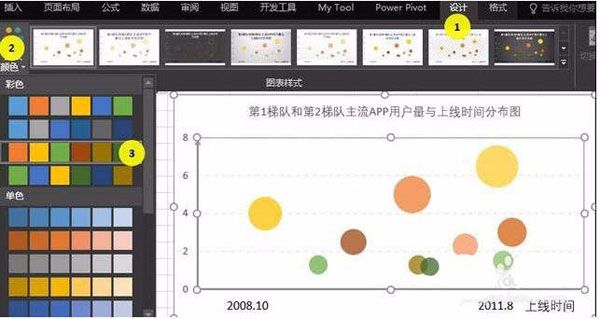
6、调色:可以使用自动依数据点着色;如果对自动填充的颜色还不满意,还可以一个气泡一个气泡进行颜色设置。
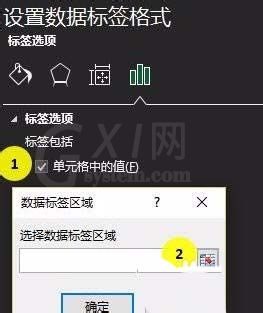
7、添加文字标签:
(1)一个文本框一个文本框进行添加标签。
(2)系统自带文本标签添加功能(注意:office2013版本适用)。
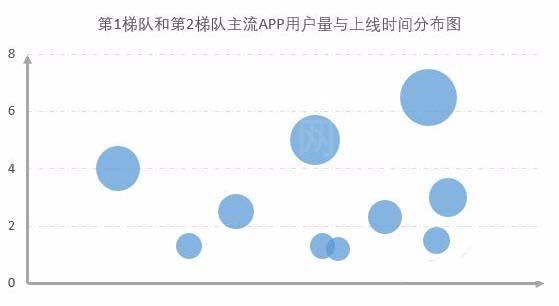
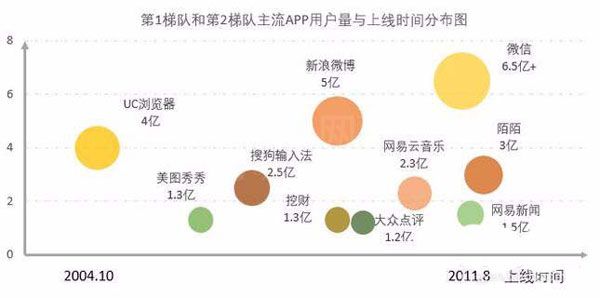
8、完成后的效果如下图所示。
各位小伙伴们,看完上面的精彩内容,都清楚Excel表格制作单轴气泡图的操作流程了吧!


热门排行
今日推荐


热门手游
-
商场购物模拟器官方版

版本:v1.0.9
大小:46.11MB
日期:2024-12-16
-
滚动方块大冒险免费版

版本:v1.0.5
大小:26.10MB
日期:2024-12-16
-
恋恋奇缘体验服版

版本:v1.0.0
大小:131.33MB
日期:2024-12-16
-
炉石传说官方正版

版本:v1.0
大小:100.52MB
日期:2024-12-16
-
人群大师免费版

版本:v2.15.0
大小:57.68MB
日期:2024-12-16
-
方鸡跳跑单机版

版本:v1
大小:63.49MB
日期:2024-12-16