iSee图片专家制作冷绿图片的操作流程
时间:2022-10-26 13:19
不少朋友都喜欢使用iSee图片专家软件,那么大家清楚iSee图片专家制作冷绿图片的相关操作吗?若还不了解,就来学习iSee图片专家制作冷绿图片的教程吧!
iSee图片专家制作冷绿图片的操作流程

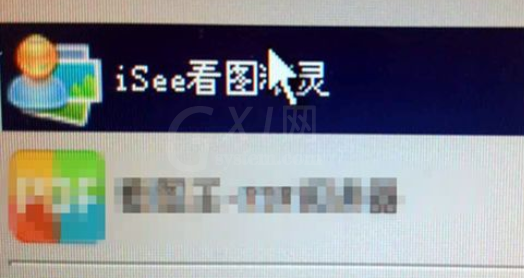
单击电脑左下角的【开始】,点开isee看图精灵。
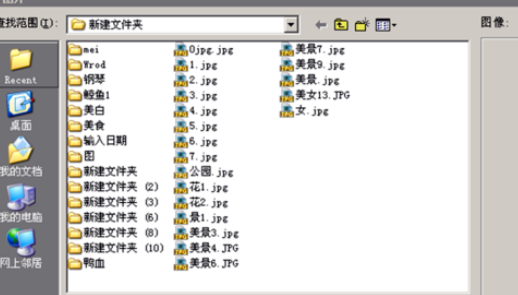
在打开【一张图片】中,选择图片的名称,打开。
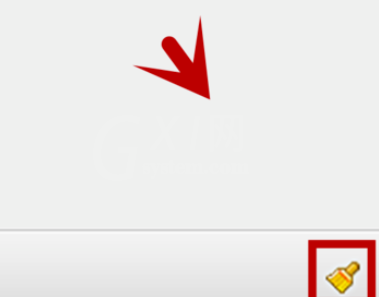
图片出现在isee看图精灵中,点击小刷子图片。
进入isee图片专家页面中。
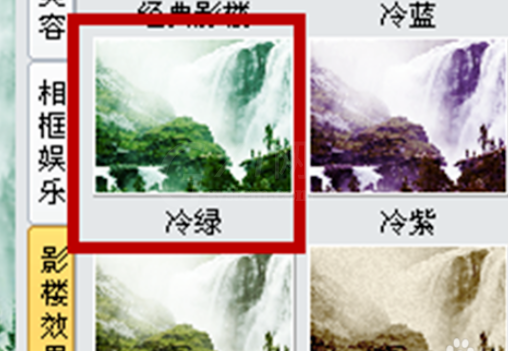
在isee图片专家页面中,点击影楼效果。
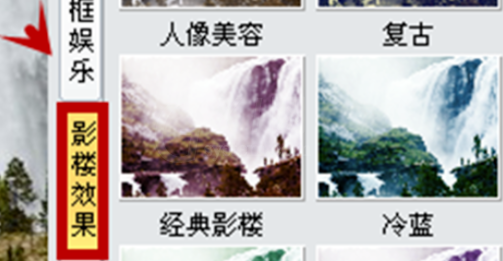
在影楼效果中选择冷绿,单击,图片变成冷绿效果。
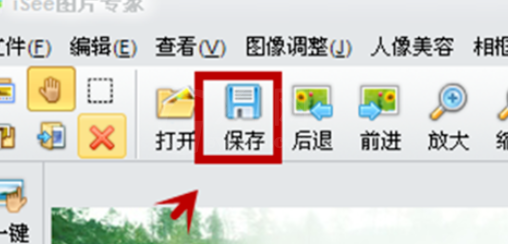
在isee图片专家页面中,点击保存。
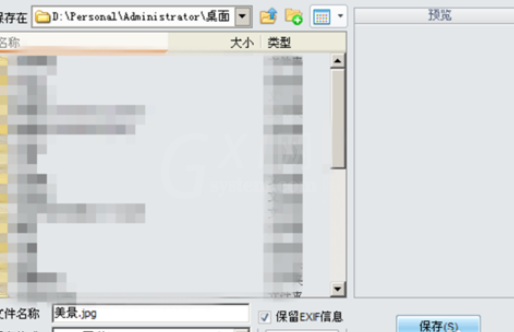
在保存图片框中,选择保存地址和名字,点击保存。
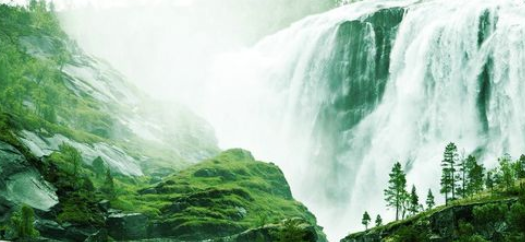
冷绿图片做好了。
各位小伙伴们,看完上面的精彩内容,都清楚iSee图片专家制作冷绿图片的操作流程了吧!


热门排行
今日推荐


热门手游
-
商场购物模拟器官方版

版本:v1.0.9
大小:46.11MB
日期:2024-12-16
-
滚动方块大冒险免费版

版本:v1.0.5
大小:26.10MB
日期:2024-12-16
-
恋恋奇缘体验服版

版本:v1.0.0
大小:131.33MB
日期:2024-12-16
-
炉石传说官方正版

版本:v1.0
大小:100.52MB
日期:2024-12-16
-
人群大师免费版

版本:v2.15.0
大小:57.68MB
日期:2024-12-16
-
方鸡跳跑单机版

版本:v1
大小:63.49MB
日期:2024-12-16