blender制作草丛草地的图文操作
时间:2022-10-26 13:26
或许各位亲们对blender这款应用是有一些了解的,但是大家知道blender制作草丛草地的相关操作吗?今天小编就来分享blender制作草丛草地的操作方法,大家可以去看一看哦。
blender制作草丛草地的图文操作

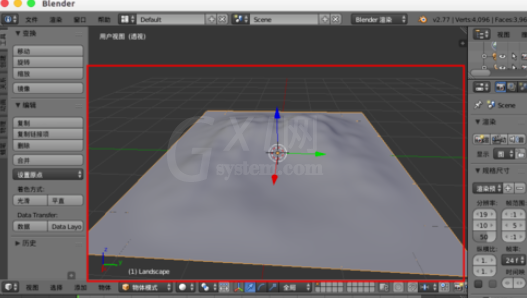
打开blender创建一块地形面。
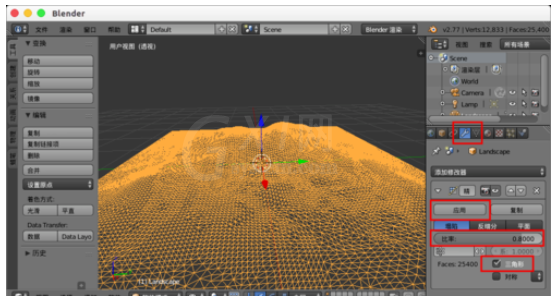
修改器中添加“精简”,比率设置为0.8,勾选三角形,最后“应用”。
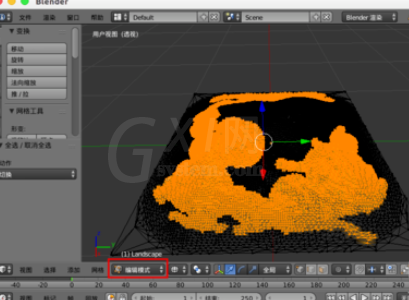
“编辑模式”,按“C”键选择需要创建草丛的区域。
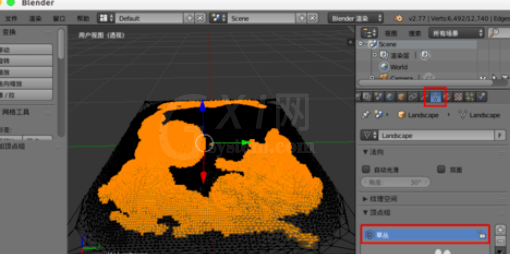
右边的属性导航中选择选择“数据”(小三角),“顶点组”中添加“草丛”,别忘记“指定”。
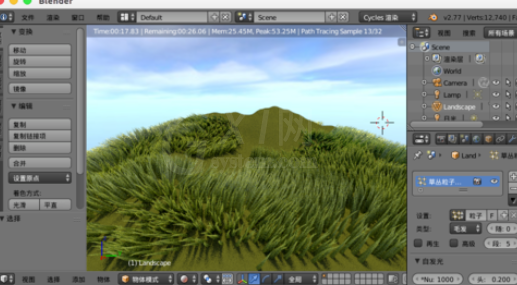
属性导航中选择“粒子系统”,创建“草丛粒子系统”,类型选择“毛发”,设置自发光里的“number(数量)”、“头发长度”。
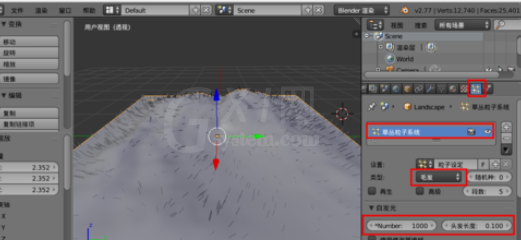
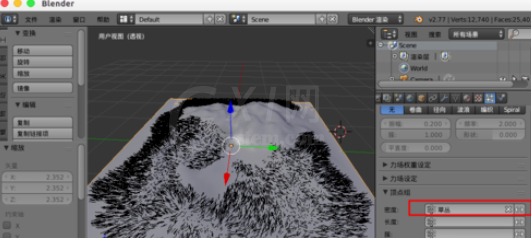
“子级”里设置“断点”,与“形状”的数值。

“顶点数组”中的“密度”选择“草丛”。
记得切换到“Cycles渲染”,新建“草丛粒子”材质,面中颜色选择草的“绿色”。
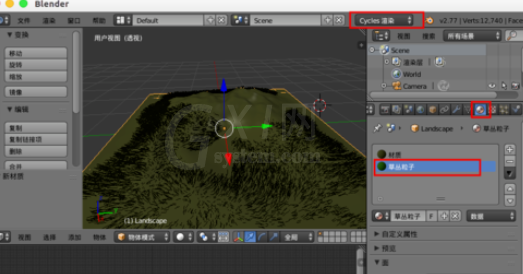
切换到“粒子”,“渲染”下的材质槽选择“草丛粒子”。
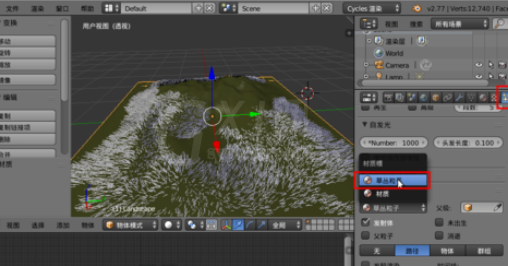
现在我们shift+z渲染预览就会出现绿色的草丛了,如果想要更好的效果还需要对“灯光”,“草丛粒子”材质等的优化。
快来学习学习blender制作草丛草地的图文操作吧,一定会帮到大家的。


热门排行
今日推荐


热门手游
-
商场购物模拟器官方版

版本:v1.0.9
大小:46.11MB
日期:2024-12-16
-
滚动方块大冒险免费版

版本:v1.0.5
大小:26.10MB
日期:2024-12-16
-
恋恋奇缘体验服版

版本:v1.0.0
大小:131.33MB
日期:2024-12-16
-
炉石传说官方正版

版本:v1.0
大小:100.52MB
日期:2024-12-16
-
人群大师免费版

版本:v2.15.0
大小:57.68MB
日期:2024-12-16
-
方鸡跳跑单机版

版本:v1
大小:63.49MB
日期:2024-12-16