edius编辑多机位模式的图文操作
时间:2022-10-26 13:29
有的用户还不会edius编辑多机位模式的相关操作,下文就分享edius编辑多机位模式的图文操作教程,希望对你们有所帮助哦。
edius编辑多机位模式的图文操作

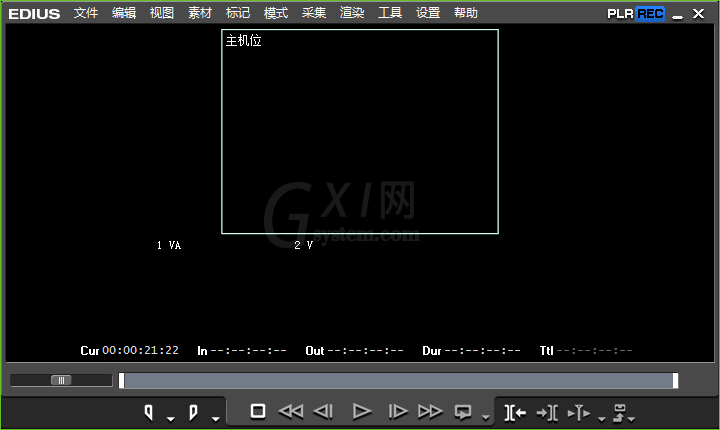
1、选择“模式”菜单下的“多机位模式”,或者按快捷键F8来切换多机位模式和常规模式,你会看到预监面板有了变化;
2、在轨道面板中鼠标右击,选择添加,在上方添加足够多的视频轨道;

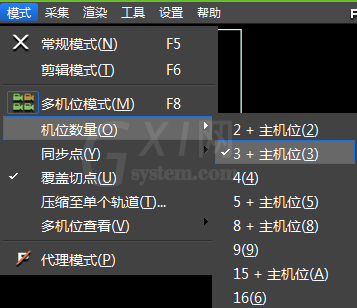
3、在“模式”菜单下,选择“机位数量”;
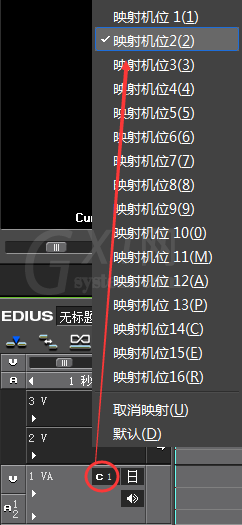
4、然后在轨道面板中点击c1、c2、c3来设置机位映射;
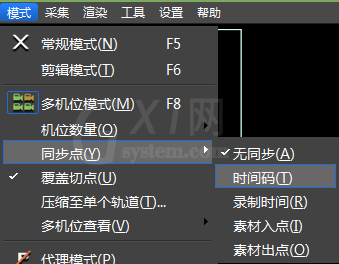
5、根据素材情况,在同步点选择对齐方式;
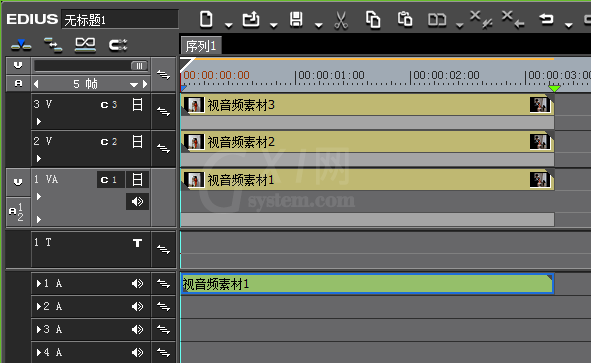
6、在素材库中,选中所有需要的素材,并拖曳到时间线上;为避免出现声音混乱,你可以将素材的视音频解锁,并将音频放置到音频轨道上;
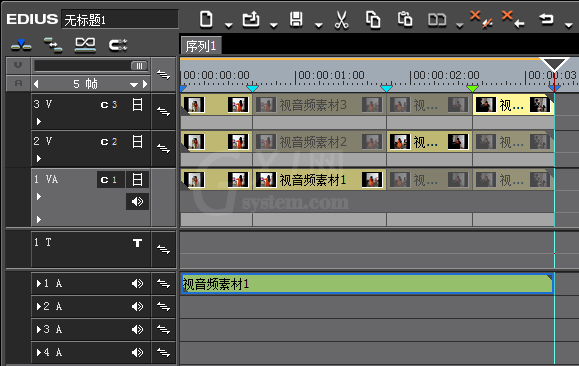
7、播放时间线,使用鼠标在监视窗口选择进行画面切换,时间线上就会有许多你切换画面的时候留下的标记,且画面被剪切了;你可以移动时间线上的标记点进行切换点的调整;
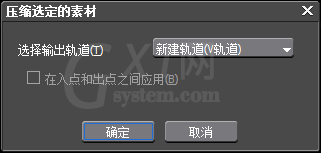
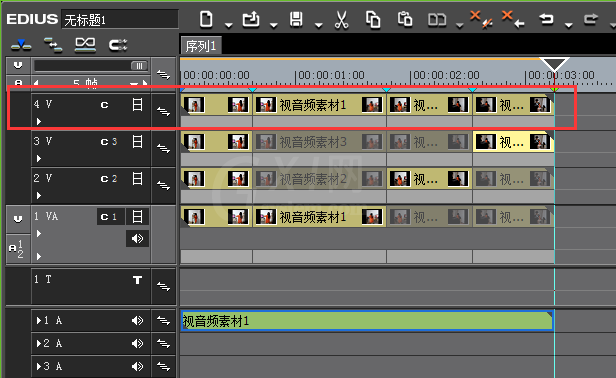
8、选择“模式”菜单下的“压缩至单个轨道”,会弹出“压缩选定的素材”对话框,点击确定,则完成了多机位制作。
上文就讲解了edius编辑多机位模式的图文操作过程,希望有需要的朋友都来学习哦。


热门排行
今日推荐


热门手游
-
商场购物模拟器官方版

版本:v1.0.9
大小:46.11MB
日期:2024-12-16
-
滚动方块大冒险免费版

版本:v1.0.5
大小:26.10MB
日期:2024-12-16
-
恋恋奇缘体验服版

版本:v1.0.0
大小:131.33MB
日期:2024-12-16
-
炉石传说官方正版

版本:v1.0
大小:100.52MB
日期:2024-12-16
-
人群大师免费版

版本:v2.15.0
大小:57.68MB
日期:2024-12-16
-
方鸡跳跑单机版

版本:v1
大小:63.49MB
日期:2024-12-16