Win10系统清掉剪切板的图文操作
时间:2022-10-26 13:33
很多小伙伴都还不知道Win10系统清掉剪切板的相关操作,那么Win10系统如何清掉剪切板的呢?下文一起来看看Win10系统清掉剪切板的操作方法吧!
Win10系统清掉剪切板的图文操作
方法一:通过快捷方式清空
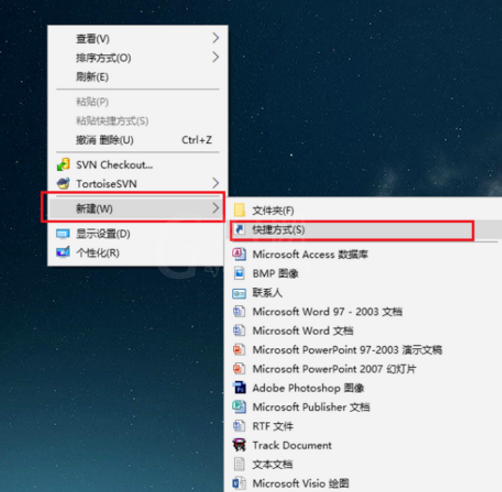
1、在win10系统桌面上鼠标右键点击“新建->快捷方式”,如下图所示:
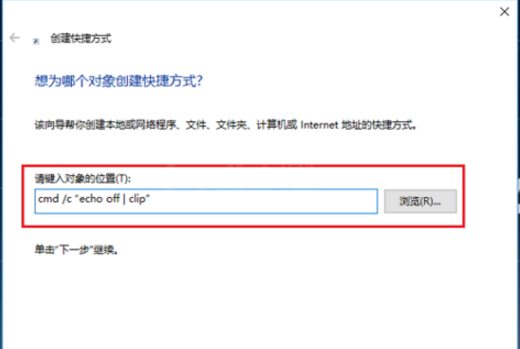
2、进去创建快捷方式界面之后,输入cmd /c “echo off | clip”,点击下一步,如下图所示:
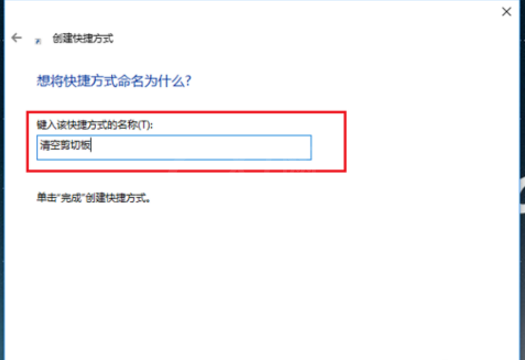
3、输入快捷方式的名称,这里输入“清空剪切板”,如下图所示:
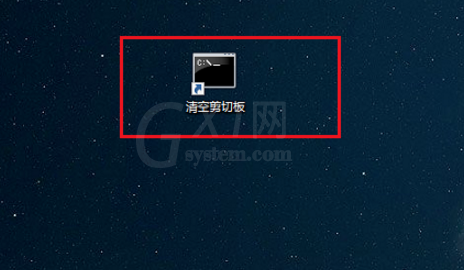
4、我们可以看到已经成功创建了一个清空剪切板的快捷方式,双击就进行清空了,如下图所示:
方法二:通过注册表设置清空
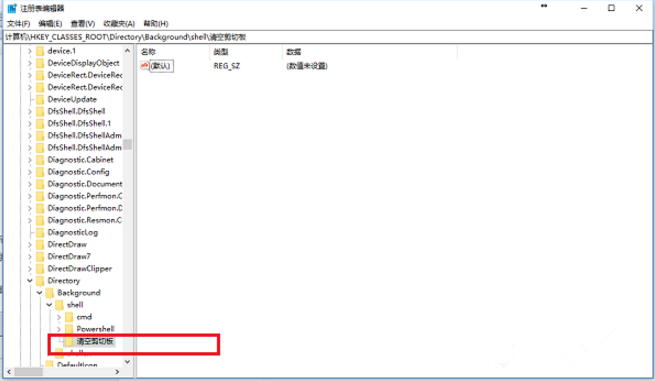
1、按win+R键打开运行,输入“regedit”打开注册表,进去之后,找到“HKEY_CLASSES_ROOT/Directory/Backgroud/shell”路径,在shell文件夹上,鼠标右键选择新建->项,命名为清空剪切板,如下图所示:
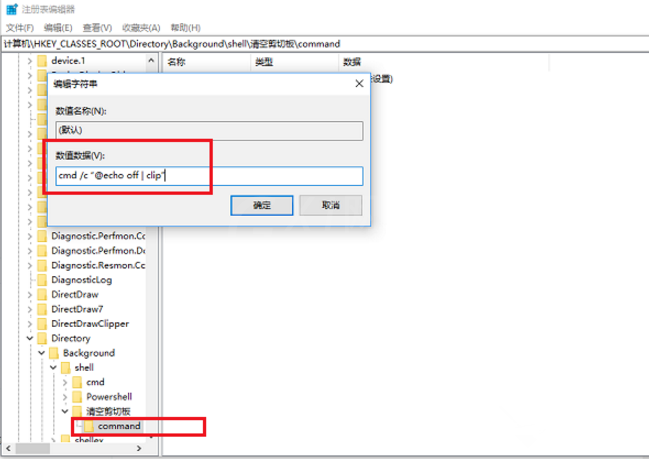
2、在清空剪切板上,鼠标右键新建->项,命名为“command”,双击command右侧的默认,设置数值数据cmd /c “@echo off | clip”,点击确定,设置完成,如下图所示:
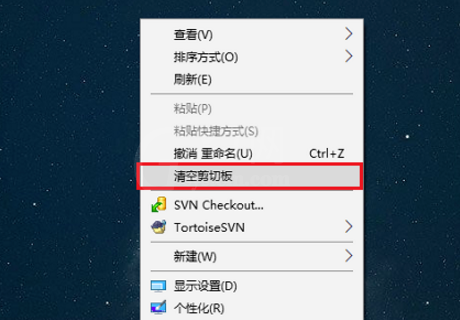
3、我们在win10系统桌面上,鼠标右键,可以看到清空剪切板,点击就清空了,如下图所示:
上文就讲解了Win10系统清掉剪切板的图文操作过程,希望有需要的朋友都来学习哦。


热门排行
今日推荐


热门手游
-
商场购物模拟器官方版

版本:v1.0.9
大小:46.11MB
日期:2024-12-16
-
滚动方块大冒险免费版

版本:v1.0.5
大小:26.10MB
日期:2024-12-16
-
恋恋奇缘体验服版

版本:v1.0.0
大小:131.33MB
日期:2024-12-16
-
炉石传说官方正版

版本:v1.0
大小:100.52MB
日期:2024-12-16
-
人群大师免费版

版本:v2.15.0
大小:57.68MB
日期:2024-12-16
-
方鸡跳跑单机版

版本:v1
大小:63.49MB
日期:2024-12-16