photoshop设置光标样式的图文操作
时间:2022-10-26 13:33
现在很多朋友都喜欢使用photoshop软件,但有些朋友还不清楚photoshop设置光标样式的相关操作,所以下面就带来了photoshop设置光标样式的教程,一起来看看吧!
photoshop设置光标样式的图文操作
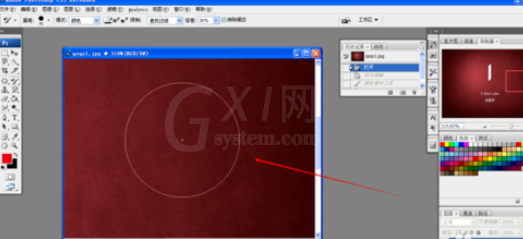
首先,我们来认识一下各种光标,下图是一个圆形光标,这种光标对控制画笔大小的能力比较强,而且中间的十字让准确度得到保证。
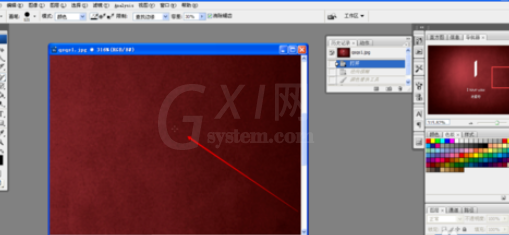
下面这一种光标是一个小十字,这种光标比较注重准确度,但是画笔的大小却无法有效体现出来,而且不太明显,小编不太经常使用这种光标。
还有一种标准样式,是一直笔的形态,如图圈出的样子,这种光标基本看不到,因为除了生动具体的优点,对于绘图并没有太大帮助。
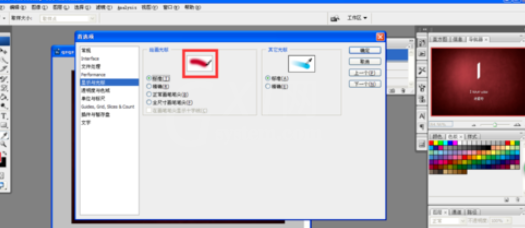
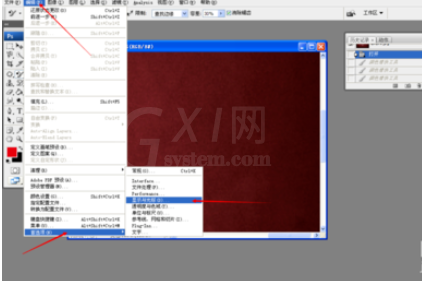
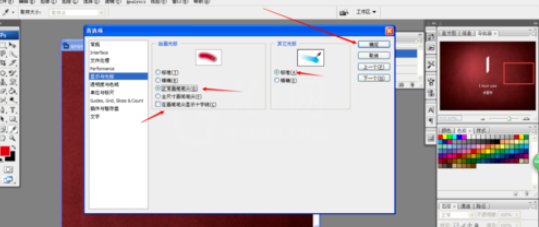
下面,我们就来看一下,如何进行光标的设定,首先在上方工具菜单中找到“编辑——首选项——显示与光标”进入光标的设置页面。
单击后就会弹出首选项对话框,进入光标的设置,一共有两个区域进行设定,有多种样式可以进行选择。
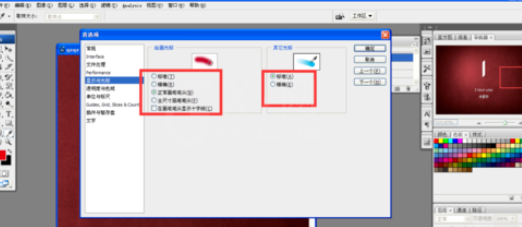
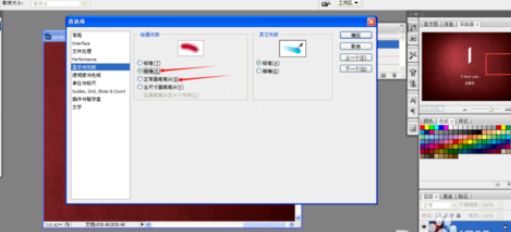
左边是以画笔为主的光标设置,一共有三个样式,有些样式还有附加的选项可以进行勾选,大家可以逐个尝试选择最顺手的光标。
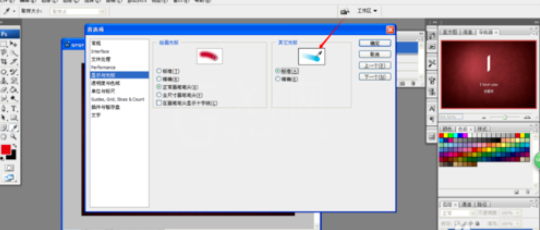
右边的是以取色光标为主的设置,标准就是我们默认的,也是十分大众的吸色光标,“精准”则是一个圆圈,比较准确。
我们把两种光标都确定下来后,选定,单击确认就完成了设置,我们就能一直使用我们感觉顺手的光标了。这个技巧操作十分实用,要掌握一下。
快来学习学习photoshop设置光标样式的图文操作吧,一定会帮到大家的。


热门排行
今日推荐


热门手游
-
商场购物模拟器官方版

版本:v1.0.9
大小:46.11MB
日期:2024-12-16
-
滚动方块大冒险免费版

版本:v1.0.5
大小:26.10MB
日期:2024-12-16
-
恋恋奇缘体验服版

版本:v1.0.0
大小:131.33MB
日期:2024-12-16
-
炉石传说官方正版

版本:v1.0
大小:100.52MB
日期:2024-12-16
-
人群大师免费版

版本:v2.15.0
大小:57.68MB
日期:2024-12-16
-
方鸡跳跑单机版

版本:v1
大小:63.49MB
日期:2024-12-16