Ae制作图像文字的操作流程
时间:2022-10-26 13:40
今天讲解了Ae制作图像文字的相关操作,相信通过学习Ae制作图像文字操作步骤,大家对Ae软件一定会有更多的了解的!
Ae制作图像文字的操作流程

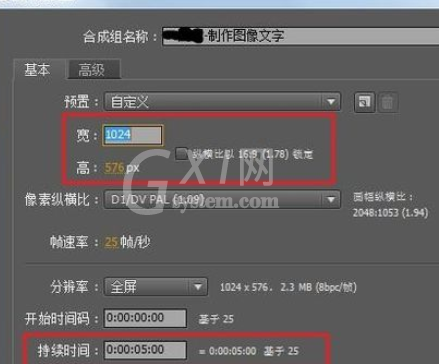
打开AE,创建新合成“制作图像文字”,在合成属性窗口中,设置宽为1024,高为576,帧速率为25,持续时间为5秒,最后单击OK。
导入素材,在时间线窗口中右击,然后新建固态层,命名为“背景1”在固体设置窗口中设置相应的参数。
为固态层依次添加“镜头光晕”,并设置光晕的相关参数。然后新建一个黑色的固态层,并命名为“光晕”,设置图层“模式”为“屏幕”,也为“光晕”图层添加“镜头光晕”、“曲线”和“快速模糊”的效果,并对其参数进行设置。

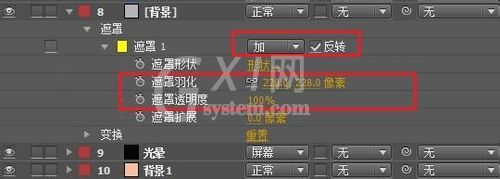
新建一个固态层,设置名字为“背景”,宽为1024,高为576,颜色为浅灰色。并选择钢笔工具,在“背景”图层上绘制遮罩,然后将遮罩设置打开,然后勾选反转,并设置遮罩羽化。
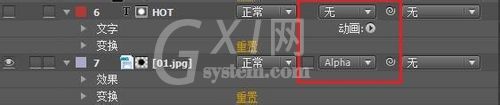
在时间线窗口中右击,然后新建文字层,命名为“HOT”,然后将“01.jpg”拖曳到时间线窗口中“HOT”图层下方,并设置其图层遮罩为“Alpha Matte “HOT””。
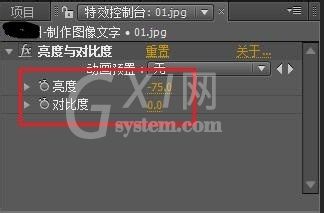
为“01.jpg”层添加“亮度&对比度”效果,并设置亮度参数为-75.
将“HOT”和“01.jpg”图层复制1份放置到图层的最顶端。并删除复制的“01.jpg”的“亮度&对比度”效果,然后复制的“HOT”层修改描边大小。

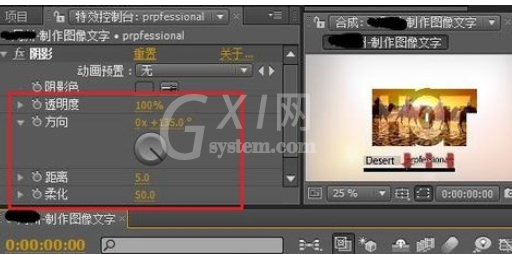
选择矩形工具,然后在监视器窗口中绘制2个矩形图案,制作出“Drsert”和“Professional”两个文字图层,最后为“Professional”层添加“阴影”效果。
最终作品效果如图所示:
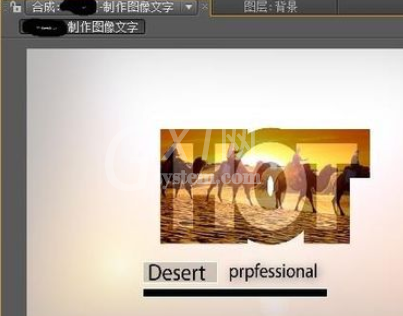
快来学习学习Ae制作图像文字的操作内容吧,一定会帮到大家的。


热门排行
今日推荐


热门手游
-
商场购物模拟器官方版

版本:v1.0.9
大小:46.11MB
日期:2024-12-16
-
滚动方块大冒险免费版

版本:v1.0.5
大小:26.10MB
日期:2024-12-16
-
恋恋奇缘体验服版

版本:v1.0.0
大小:131.33MB
日期:2024-12-16
-
炉石传说官方正版

版本:v1.0
大小:100.52MB
日期:2024-12-16
-
人群大师免费版

版本:v2.15.0
大小:57.68MB
日期:2024-12-16
-
方鸡跳跑单机版

版本:v1
大小:63.49MB
日期:2024-12-16