photoshop打造彩色下落字的图文操作
时间:2022-10-26 13:58
彩色下落字给人一种特别的视觉感。今天小编就讲解photoshop打造彩色下落字的图文操作方法哦,希望能够帮助到大家呢。
photoshop打造彩色下落字的图文操作

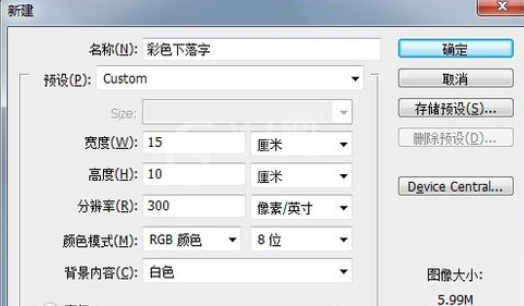
执行菜单“文件”→→“新建”命令,“新建”对话框调整为如图所示。
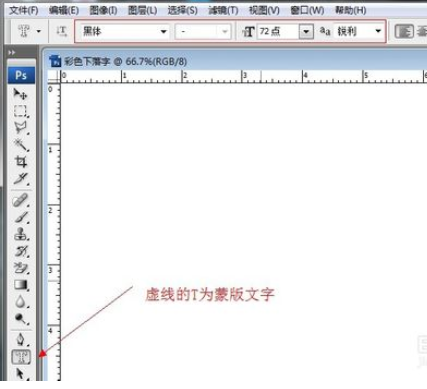
在图层面板中单击“创建新图层”按钮,创建“图层1”,选择工具工具箱中的竖排文字蒙版工具,工具选项调整入下图。
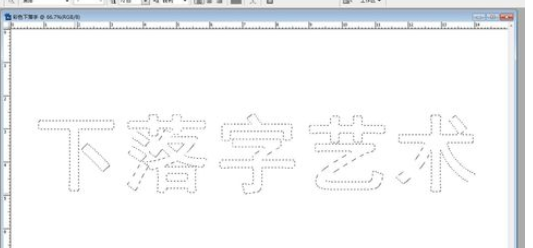
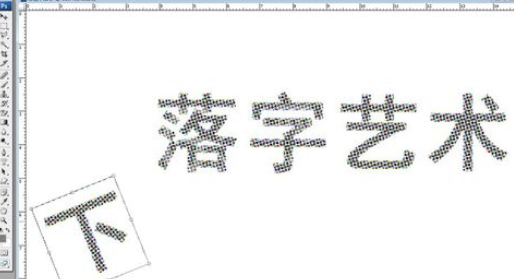
创建蒙版文字“下落字艺术”,前景色调整为(R127、G127、B127),如图
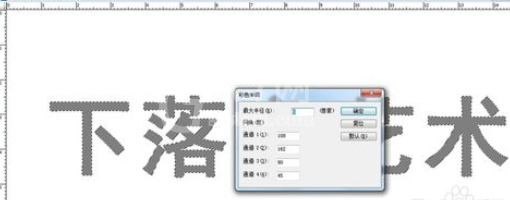
按Ait+Delete组合键,有那个前景色填充文字,执行菜单“滤镜”→“像素化”→“彩色半调”命令,“彩色半调”对话框调整如图。
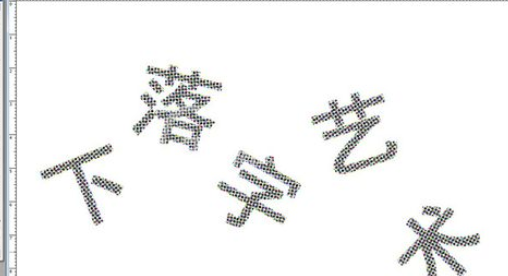
选择工具箱中的矩形选框工具,框选其中的“下”字,按Ctrl键移动位置,按Ctr+T组合键旋转方向,如图所示。
重复上一步操作,把所有文字的方向和位置做一定的修改
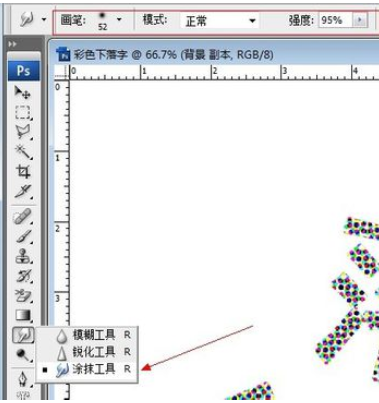
选择工具箱中的涂抹工具,工具选项栏调整为下图所示。
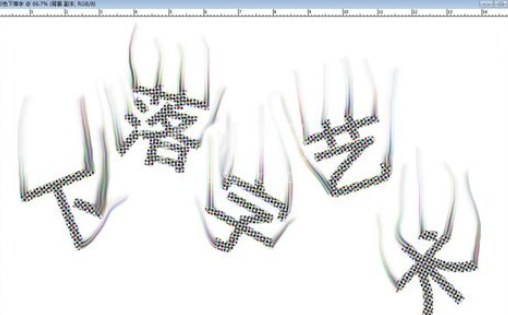
按住鼠标左键对每个字进行逐一涂抹处理,制作完成,如图。
各位小伙伴们,看完上面的精彩内容,都清楚photoshop打造彩色下落字的图文操作了吧!


热门排行
今日推荐


热门手游
-
商场购物模拟器官方版

版本:v1.0.9
大小:46.11MB
日期:2024-12-16
-
滚动方块大冒险免费版

版本:v1.0.5
大小:26.10MB
日期:2024-12-16
-
恋恋奇缘体验服版

版本:v1.0.0
大小:131.33MB
日期:2024-12-16
-
炉石传说官方正版

版本:v1.0
大小:100.52MB
日期:2024-12-16
-
人群大师免费版

版本:v2.15.0
大小:57.68MB
日期:2024-12-16
-
方鸡跳跑单机版

版本:v1
大小:63.49MB
日期:2024-12-16