foxmail进行设置的详细操作
时间:2022-10-26 13:58
想必一些朋友还弄不明白foxmail进行设置的详细操作,而下面就分享了foxmail进行设置的操作方法,一起来看看吧。
foxmail进行设置的详细操作

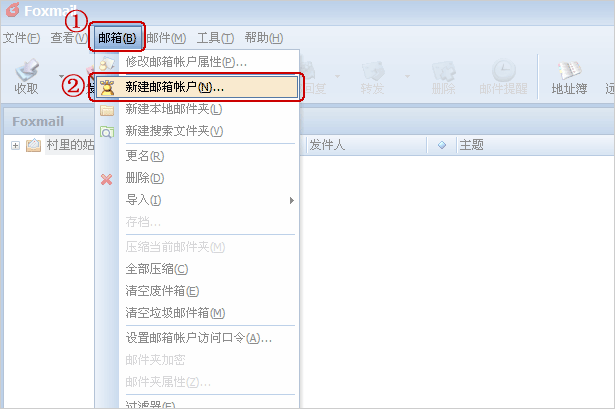
一、打开 Foxmail,点击“邮箱”菜单中的“新建邮箱帐户”;
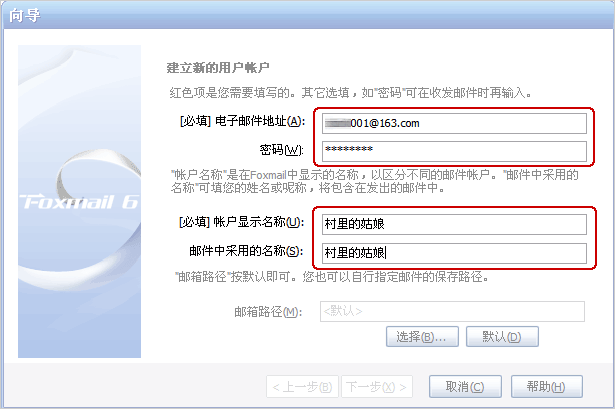
二、进入 Foxmail 向导,输入“电子邮件地址”、“密码”、“帐户名称”、“邮箱中采用的名称”以及路径选择 ,点击“下一步”;
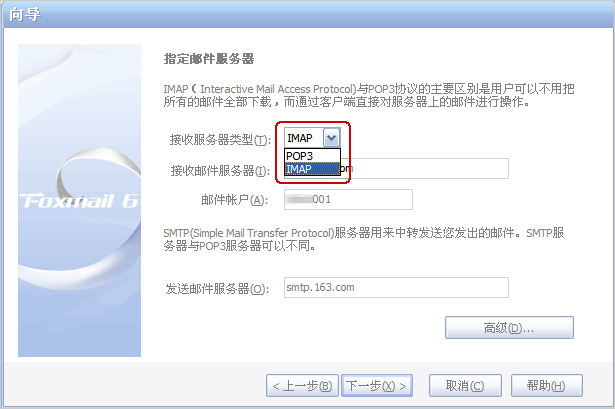
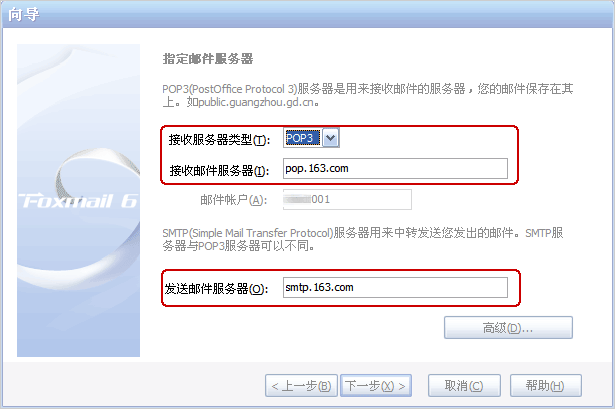
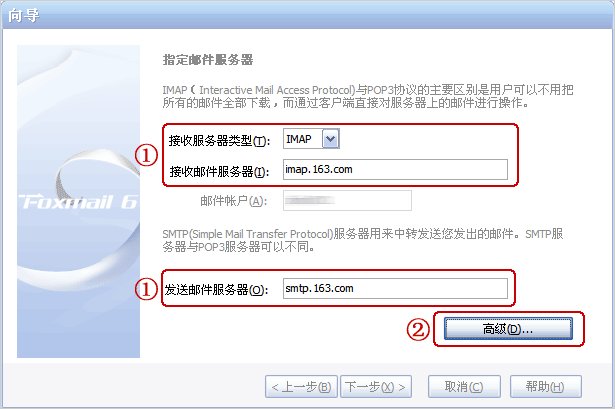
三、接收服务器类型您可以选择POP3或IMAP; <小贴士: 了解POP3、SMTP、IMAP>
如果您选择POP3服务器:请输入您邮箱的的POP3和SMTP服务器地址后,再点击“下一步”;
POP3服务器:pop.163.com SMTP服务器:smtp.163.com (端口号使用默认值)
如果您选择IMPA服务器:请输入您邮箱的的IMAP和SMTP服务器地址后,再点击“下一步”;
IMAP服务器:imap.163.com SMTP服务器:smtp.163.com (端口号使用默认值)
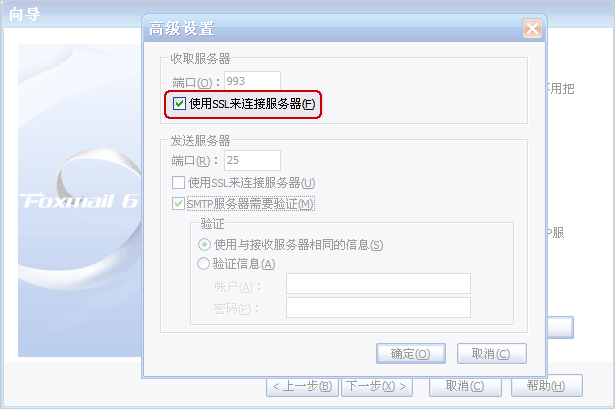
把“收取服务器”的“使用SSL来连接服务器”打勾(所有通过IMAP传输的数据都会被加密,从而保证通信的安全性。),“确定”后点击“下一步”;
四、然后点击“完成”;

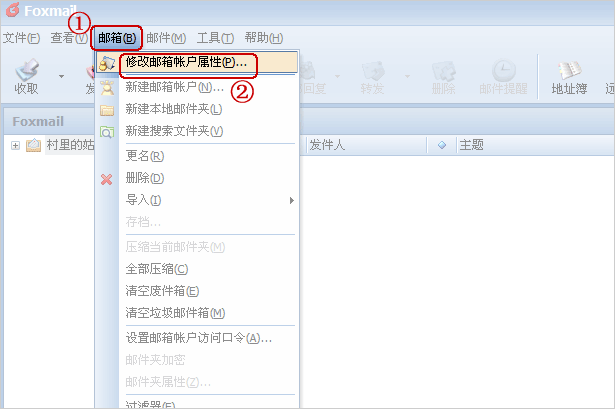
五、点击“邮箱”菜单中的“修改邮箱帐户属性”;
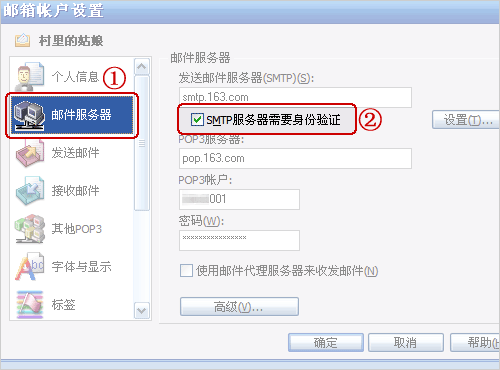
·在弹出窗口选择“邮件服务器”——在右边“SMTP 服务器需要身份验证”栏前的空格打勾;
·并点击旁边的“设置”按钮;
·选择“使用与 pop 服务器相同的信息”。;
·点击“确定”。
上文就讲解了foxmail进行设置的详细操作,希望有需要的朋友都来学习哦。


热门排行
今日推荐


热门手游
-
商场购物模拟器官方版

版本:v1.0.9
大小:46.11MB
日期:2024-12-16
-
滚动方块大冒险免费版

版本:v1.0.5
大小:26.10MB
日期:2024-12-16
-
恋恋奇缘体验服版

版本:v1.0.0
大小:131.33MB
日期:2024-12-16
-
炉石传说官方正版

版本:v1.0
大小:100.52MB
日期:2024-12-16
-
人群大师免费版

版本:v2.15.0
大小:57.68MB
日期:2024-12-16
-
方鸡跳跑单机版

版本:v1
大小:63.49MB
日期:2024-12-16