python 2.7实现智能对话的详细操作方法
时间:2022-10-26 16:01
今天小编就带大家来共同学习python 2.7实现智能对话的详细操作方法,希望可以帮助到有需要的小伙伴哦。
python 2.7实现智能对话的详细操作方法

1.下载python运行环境,这里是使用的2.7,可网络搜索python2.7下载安装
2.python 代码
from aip import AipSpeech
import urllib
import json
import requests
import mp3play
import pyaudio
import wave
import time
APP_ID = ''
API_KEY = ''
SECRET_KEY = ''
aipSpeech = AipSpeech(APP_ID, API_KEY, SECRET_KEY)
key = ''
api = 'http://www.tuling123.com/openapi/api?key=' + key + '&info='
url = "http://www.tuling123.com/openapi/api"
user_id = 'tosobright'
def get_file_content(filePath):
with open(filePath, 'rb') as fp:
return fp.read()
def getHtml(url):
page = urllib.urlopen(url)
html = page.read()
return html
def getHtml2(data):
body = {'key': key, 'info': data.encode('utf8'), 'userid': user_id}
r = requests.post(url, data=body)
return r.text
while 1:
print("------Start-------")
p = pyaudio.PyAudio()
RECORD_SECONDS = 5
stream = p.open(format=8,channels=1,rate=16000,input=True,frames_per_buffer=1024)
print("* recording")
frames = []
for i in range(0, int(16000 / 1024 * RECORD_SECONDS)):
data = stream.read(1024)
frames.append(data)
print("* done recording")
stream.stop_stream()
stream.close()
p.terminate()
wf = wave.open("record.pcm", 'wb')
wf.setnchannels(1)
wf.setsampwidth(p.get_sample_size(8))
wf.setframerate(16000)
wf.writeframes(b''.join(frames ))
wf.close()
print('* Get Data From Baidu')
res = aipSpeech.asr(get_file_content('record.pcm'), 'pcm', 16000, {
'lan': 'zh',
})
print res
print res.get('result')[0].encode('cp936')
print('* Get Data From Tuling')
#request = api + res.get('result')[0].encode('cp936')
#print request
#response = getHtml(request)
response = getHtml2(res.get('result')[0])
dic_json = json.loads(response)
print dic_json['text']
print('* Get mp3 From Baidu')
result = aipSpeech.synthesis(dic_json['text'], 'zh', 1, {
'vol': 5,
})
if not isinstance(result, dict):
with open('au.mp3', 'wb') as f:
f.write(result)
print('* Play mp3')
mp3 = mp3play.load('au.mp3')
mp3.play()
time.sleep(min(30, mp3.seconds()))
mp3.close()
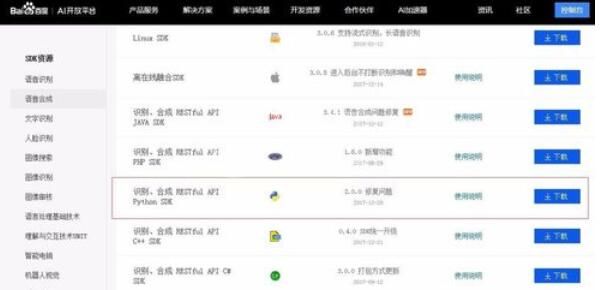
3.注册百度账号,并进入百度AI开放平台,下载sdk,并获取到你个人的
APP_ID = ''
API_KEY = ''
SECRET_KEY = ''
4.注册灵图账号,并获取灵图key,将key值填入代码
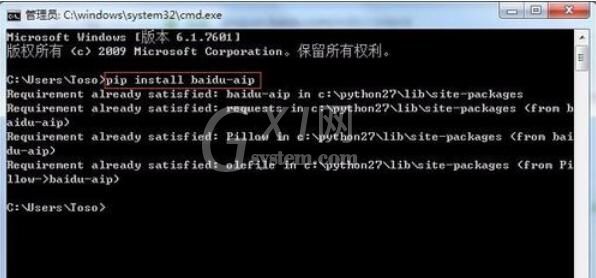
5.安装python的依赖库pip install baidu-aip
pip install requests
pip install mp3play
pip install pyaudio
6.将第2步的代码保存成ai.py文件,并使用python IDE打开,运行即可.
以上就是python 2.7实现智能对话的详细操作方法,希望学习后对你有所帮助。


热门排行
今日推荐


热门手游
-
商场购物模拟器官方版

版本:v1.0.9
大小:46.11MB
日期:2024-12-16
-
滚动方块大冒险免费版

版本:v1.0.5
大小:26.10MB
日期:2024-12-16
-
恋恋奇缘体验服版

版本:v1.0.0
大小:131.33MB
日期:2024-12-16
-
炉石传说官方正版

版本:v1.0
大小:100.52MB
日期:2024-12-16
-
人群大师免费版

版本:v2.15.0
大小:57.68MB
日期:2024-12-16
-
方鸡跳跑单机版

版本:v1
大小:63.49MB
日期:2024-12-16