按键精灵中使用录制功能的操作教程
时间:2022-10-26 16:56
有很多人不了解按键精灵中使用录制功能的操作教程,那么今天小编就在这里给大家分享一点我的小经验,希望可以给你们带来帮助。
按键精灵中使用录制功能的操作教程

我们先打开按键精灵,点击上方【录制】

然后我们点击红色圆点开始录制,可用快捷键控制录制开始和结束
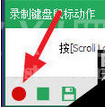
默认的开始/结束快捷键是【Scroll Lock】,暂停是【Alt+Scroll Lock】,若要修改点击【热键】
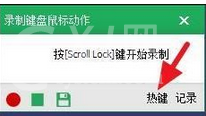
接着我们点击下方【记录】,可设置记录的键盘鼠标动作,一般都不要记录鼠标移动的轨迹

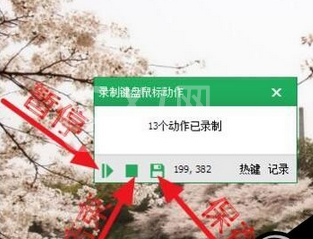
正式开始录制,录制过程中可点击暂停,录制结束后点击停止然后保存脚本就行
然后就可以看到录制的脚本了,双击打开
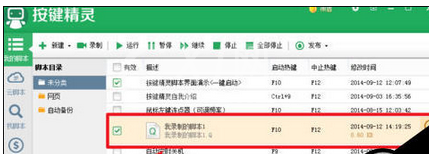
可能点击的过程速度不快,会有延迟,想脚本运行的时候快一点,可以将窗口切换到源文件
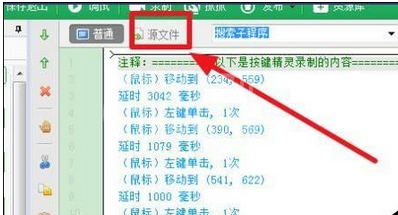
这时修改【Delay】后面的数值,就可以缩短每个动作之间的间隔时间,脚本运行一次的时间就会减少

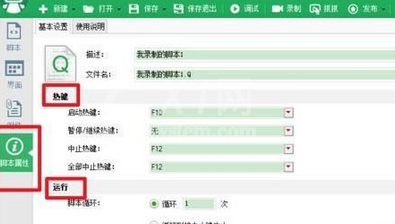
最后一步在【脚本属性】下,设置循环次数、启动和停止的快捷键,下面就可以使用脚本了
你们看完了上文讲解的按键精灵中使用录制功能的详细操作流程,自己也赶紧去动手试试吧!


热门排行
今日推荐


热门手游
-
商场购物模拟器官方版

版本:v1.0.9
大小:46.11MB
日期:2024-12-16
-
滚动方块大冒险免费版

版本:v1.0.5
大小:26.10MB
日期:2024-12-16
-
恋恋奇缘体验服版

版本:v1.0.0
大小:131.33MB
日期:2024-12-16
-
炉石传说官方正版

版本:v1.0
大小:100.52MB
日期:2024-12-16
-
人群大师免费版

版本:v2.15.0
大小:57.68MB
日期:2024-12-16
-
方鸡跳跑单机版

版本:v1
大小:63.49MB
日期:2024-12-16