淘宝助理批量设置上架时间的操作步骤
时间:2022-10-26 17:02
本教程主要给各位亲们讲解了淘宝助理批量设置上架时间的详细操作步骤,需要了解的亲们可以一起去看看下文淘宝助理批量设置上架时间的操作方法,希望能够帮助到大家。
淘宝助理批量设置上架时间的操作步骤

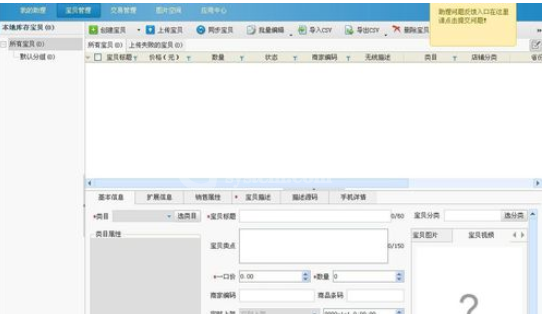
我们需要先登陆淘宝助理后选择顶部的”宝贝管理“选项,在左侧选择”线上仓库中的宝贝“选项
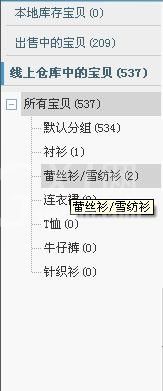
然后我们选择宝贝列表,如图所示
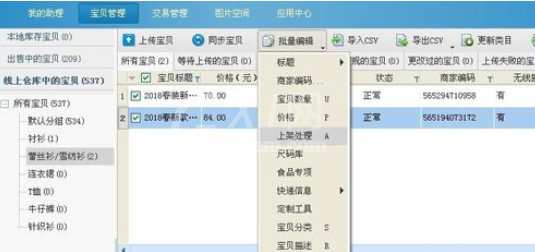
接下来我们在左侧勾选需设置上架时间的宝贝,单击”批量编辑“按钮,在下拉列表中选择”上架处理“选项
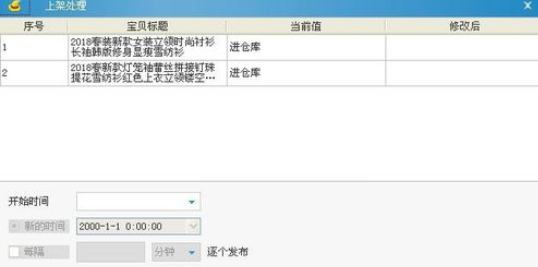
最后会弹出”上架处理“对话框,在开始的时间下拉菜单中选择”定时上架“,并设置新的时间与间隔时间
看完了上文所描述的淘宝助理批量设置上架时间的操作流程介绍,你们是不是都明白了呀!


热门排行
今日推荐


热门手游
-
商场购物模拟器官方版

版本:v1.0.9
大小:46.11MB
日期:2024-12-16
-
滚动方块大冒险免费版

版本:v1.0.5
大小:26.10MB
日期:2024-12-16
-
恋恋奇缘体验服版

版本:v1.0.0
大小:131.33MB
日期:2024-12-16
-
炉石传说官方正版

版本:v1.0
大小:100.52MB
日期:2024-12-16
-
人群大师免费版

版本:v2.15.0
大小:57.68MB
日期:2024-12-16
-
方鸡跳跑单机版

版本:v1
大小:63.49MB
日期:2024-12-16