Adobe Photoshop制作钛金字的具体操作教程
时间:2022-10-26 17:05
最近很多朋友咨询关于Adobe Photoshop制作钛金字的问题,今天的这篇教程就来聊一聊这个话题,希望可以帮助到有需要的朋友。
Adobe Photoshop制作钛金字的具体操作教程
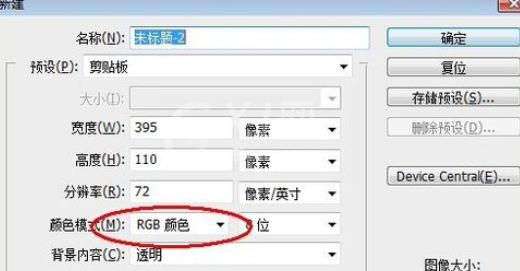
我们先新建图层。如图示,必须为RGB 模式的,大小自定。
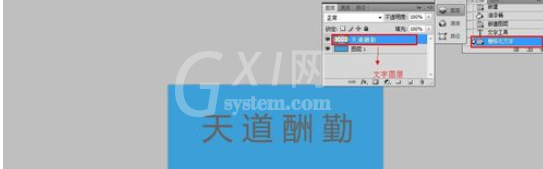
然后我们填充背景。以任意颜色填充图层,我所用的是3c9fd7(蓝色),当然用黑色(000000)对比效果会更好。

这时新建文字图层。这里我们选用颜色646464(灰色)作为文字颜色,并在图层上写上文字。
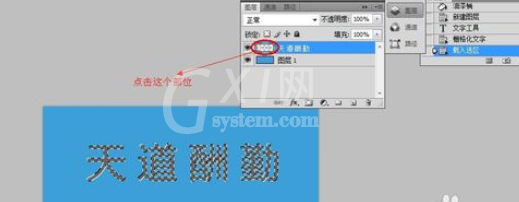
栅格化文字。保持文字图层选中状态,栅格化文字。(图层-栅格化-文字)
存储选区。保持文字图层的选中状态,左手按住ctrl键,右手单击鼠标左键,点击文字图层,见到文字包上一层虚线框就说明做对了。
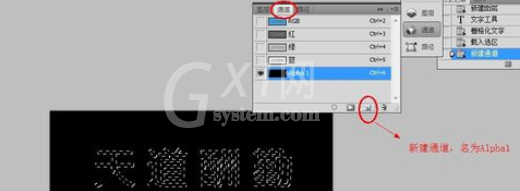
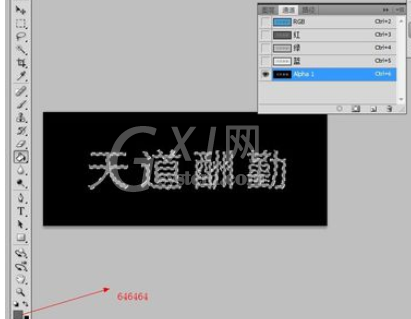
接下来我们新建通道。切换至通道选项卡,新建通道,默认名为Alpha1,以646464(灰色)填充文字
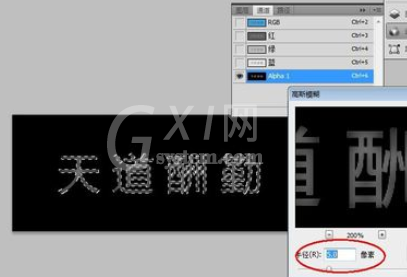
高斯模糊。保持新建通道Alpha1的选中状态,执行滤镜-模糊-高斯模糊,执行3次高斯模糊,半径按照5,3,1来,据说能实现平滑过渡。(半径大小按照字体大小设定)
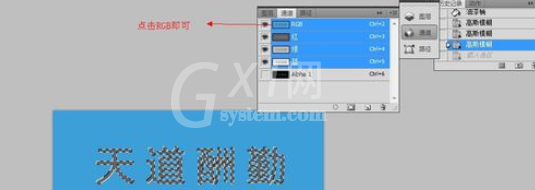
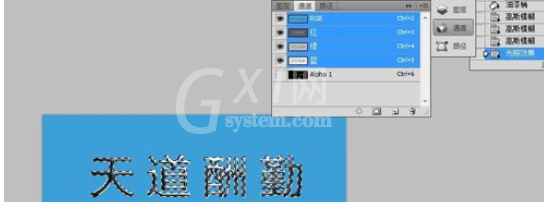
切换到RGB通道。点击通道面板上的RGB就会自动将四个通道图层选中。
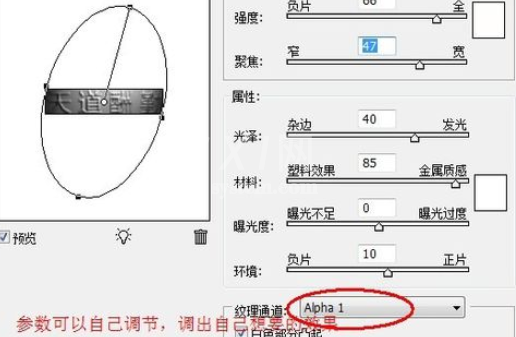
渲染光照效果。执行滤镜-效果-光照效果,参数如图,也可自行调整。
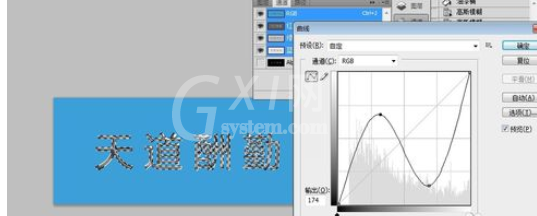
调整曲线。执行图像-调整-曲线,如图,执行完成后金属感比之前强了。
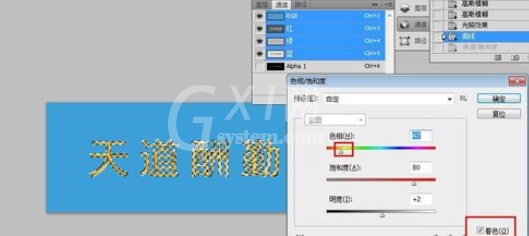
调整色相饱和度。执行图像-调整-色相饱和度,参数自行调节,达到自己想要的效果。
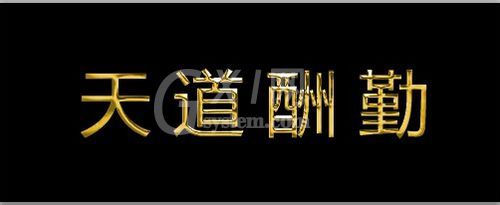
最终效果:
根据上文为你们所描述的Adobe Photoshop制作钛金字的操作流程介绍,伙伴们是不是都学会了呀!


热门排行
今日推荐


热门手游
-
商场购物模拟器官方版

版本:v1.0.9
大小:46.11MB
日期:2024-12-16
-
滚动方块大冒险免费版

版本:v1.0.5
大小:26.10MB
日期:2024-12-16
-
恋恋奇缘体验服版

版本:v1.0.0
大小:131.33MB
日期:2024-12-16
-
炉石传说官方正版

版本:v1.0
大小:100.52MB
日期:2024-12-16
-
人群大师免费版

版本:v2.15.0
大小:57.68MB
日期:2024-12-16
-
方鸡跳跑单机版

版本:v1
大小:63.49MB
日期:2024-12-16