Adobe Photoshop将视频作为GIF动图的方法步骤
时间:2022-10-26 17:14
当我们在使用Adobe Photoshop的时候,因需求要将视频作为GIF动图,有些朋友还不熟悉操作方法?一起去看看Adobe Photoshop将视频作为GIF动图的方法步骤,相信你会喜欢的。
Adobe Photoshop将视频作为GIF动图的方法步骤

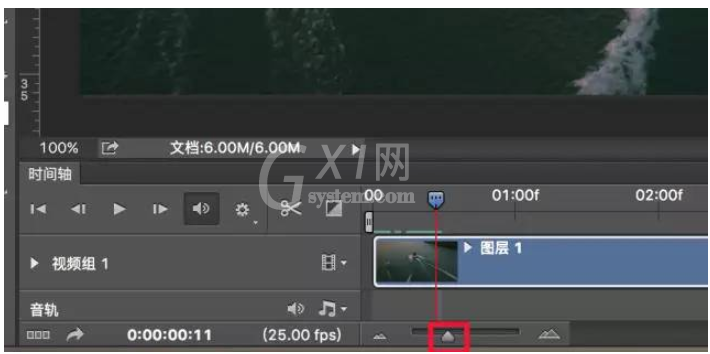
我们需要先打开Photoshop软件,直接导入视频素材,界面下方将弹出时间轴操作界面,滑动箭头展开所有的帧,拖动图标来回移动,如图,
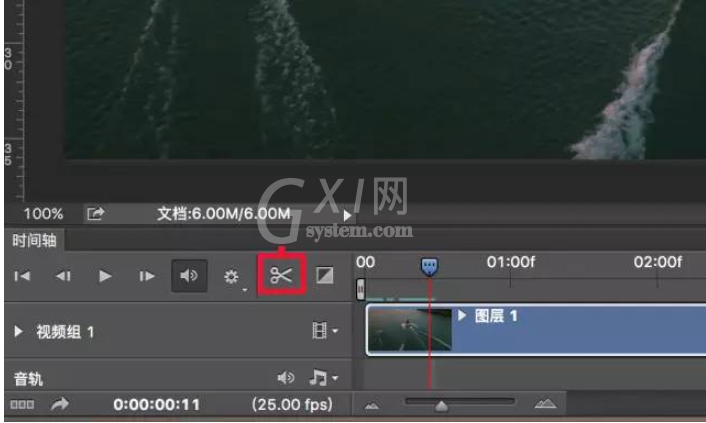
然后我们选择所需要的视频范围,可以移动截切控件进行选择,也可以使用编辑界面的裁剪工具来裁切,

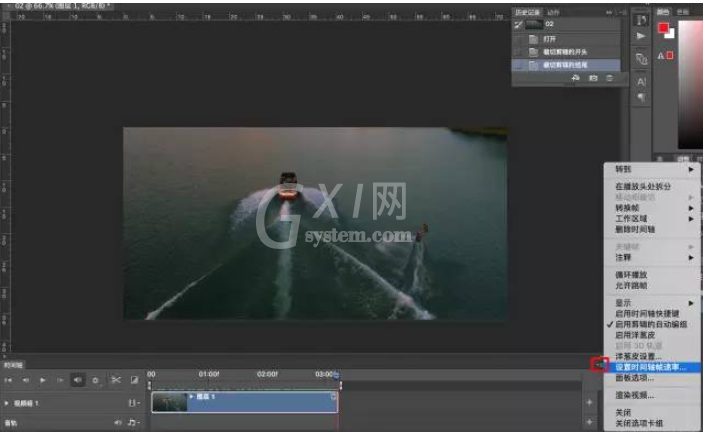
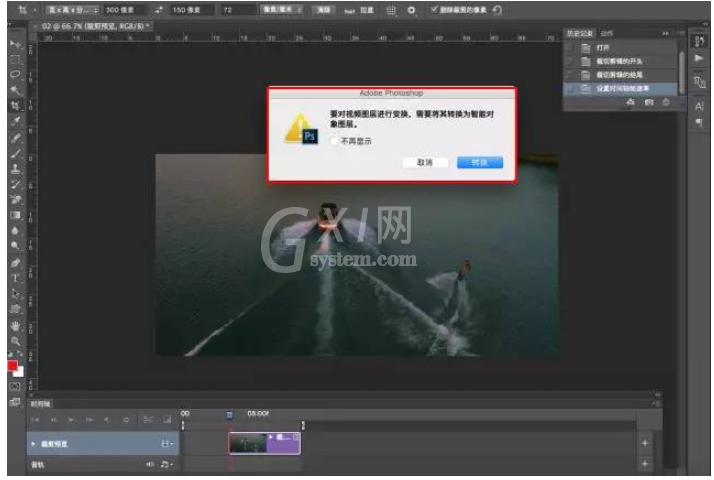
这时我们点击右边选框选项,在弹出的对话框中点击设置时间轴帧速率,
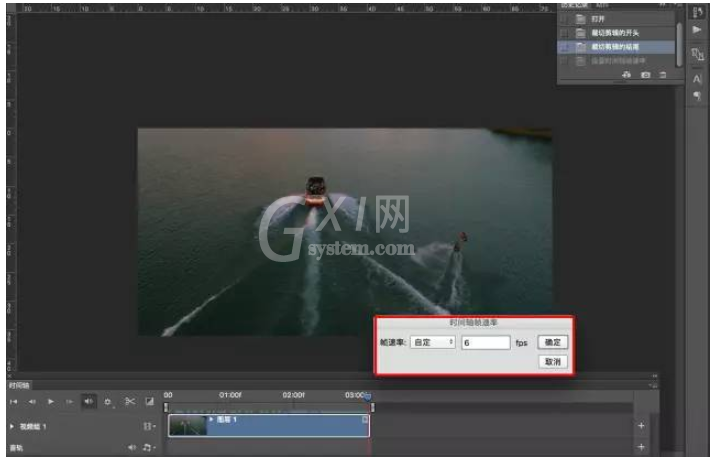
一般设置数值为为6~10,帧数越小,制作的GIF图片越小,
接下来我们在工具栏中选择裁剪工具,更改照片的宽高比,宽度一般为300像素,高度为200 (可以根据画面进行裁剪)72像素英寸,
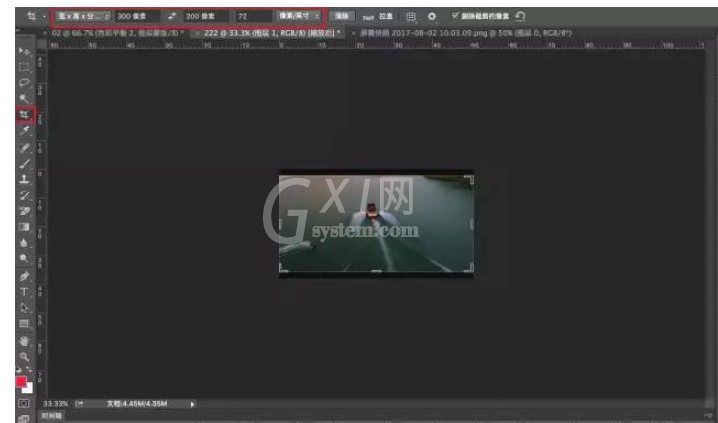
分辨率越小,制作的GIF图片就越小,裁剪之后会弹出对话框,点击“转换”,画面变小,
最后一步我们保存文件,选择存储为Web所用格式,弹出对话框,在预设下边选择GIF ,颜色推荐为64或32,循环选项“永远”,最后选择存储位置。
上文就是Adobe Photoshop将视频作为GIF动图的方法步骤,你们应该都学会了吧!


热门排行
今日推荐


热门手游
-
商场购物模拟器官方版

版本:v1.0.9
大小:46.11MB
日期:2024-12-16
-
滚动方块大冒险免费版

版本:v1.0.5
大小:26.10MB
日期:2024-12-16
-
恋恋奇缘体验服版

版本:v1.0.0
大小:131.33MB
日期:2024-12-16
-
炉石传说官方正版

版本:v1.0
大小:100.52MB
日期:2024-12-16
-
人群大师免费版

版本:v2.15.0
大小:57.68MB
日期:2024-12-16
-
方鸡跳跑单机版

版本:v1
大小:63.49MB
日期:2024-12-16