淘宝助理设置横版打印的操作步骤
时间:2022-10-26 17:53
很多的用户们刚刚接触淘宝助理,还不熟悉设置横版打印是怎么使用的?今日在此篇文章内小编就为你们带来了淘宝助理设置横版打印的操作步骤。
淘宝助理设置横版打印的操作步骤

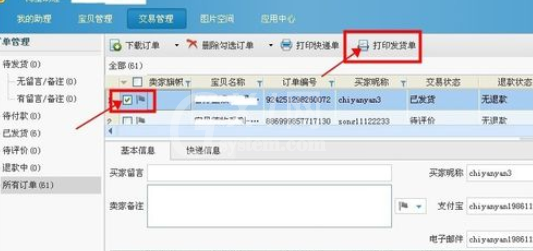
首先登陆淘宝助理账号,在交易管理里面下载需要打印的订单,选择订单,点击打印发货单。如图所示
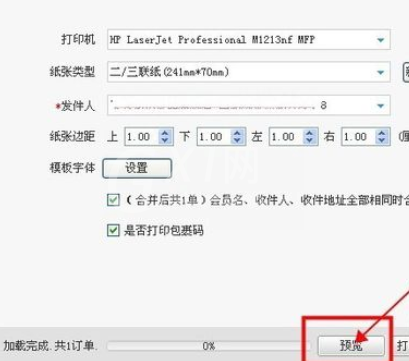
这时出现一个打印发货单的页面,点击“预览”如图所示
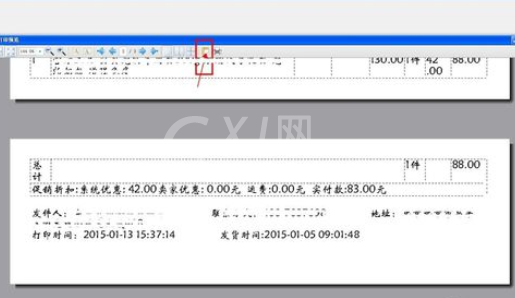
预览后发现是如图所示的样式,点击“打印设置”
然后我们在打印设置里选择方向中的“横向”如图所示
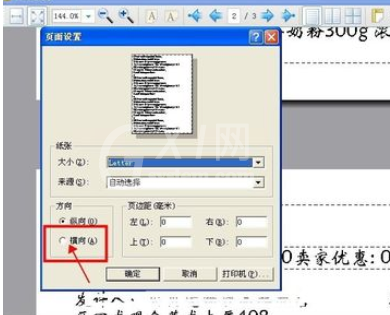
如图所示,选择横向后的样式,只需要一张纸就可以打印完成了。

看完了上文所述的淘宝助理设置横版打印的详细操作流程,伙伴们自己也赶快动手试试吧!


热门排行
今日推荐


热门手游
-
商场购物模拟器官方版

版本:v1.0.9
大小:46.11MB
日期:2024-12-16
-
滚动方块大冒险免费版

版本:v1.0.5
大小:26.10MB
日期:2024-12-16
-
恋恋奇缘体验服版

版本:v1.0.0
大小:131.33MB
日期:2024-12-16
-
炉石传说官方正版

版本:v1.0
大小:100.52MB
日期:2024-12-16
-
人群大师免费版

版本:v2.15.0
大小:57.68MB
日期:2024-12-16
-
方鸡跳跑单机版

版本:v1
大小:63.49MB
日期:2024-12-16