Photoshop无损放大照片的详细方法
时间:2022-10-26 17:54
当前不少网友表示自己才接触Photoshop这款应用,还不晓得无损放大照片的操作,接下来就为你们分享Photoshop无损放大照片的详细方法,大家都来一起学习吧。
Photoshop无损放大照片的详细方法

打开Photoshop,导入一张图片素材,将图片正常缩放3倍,可以看到图片特别模糊,

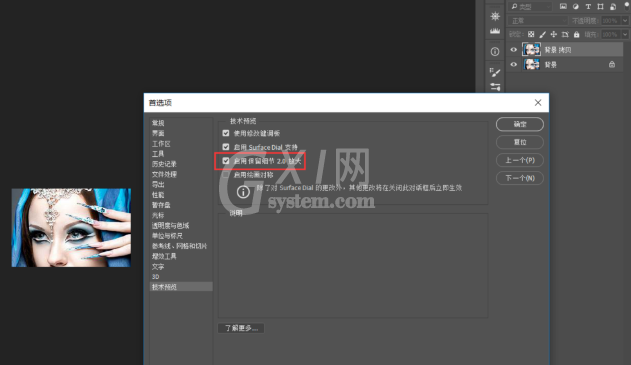
按住快捷键【ctrl+J】来复制图层,打开菜单栏的编辑——首选项——技术预览,勾选“保留细节2.0”,点击确定,
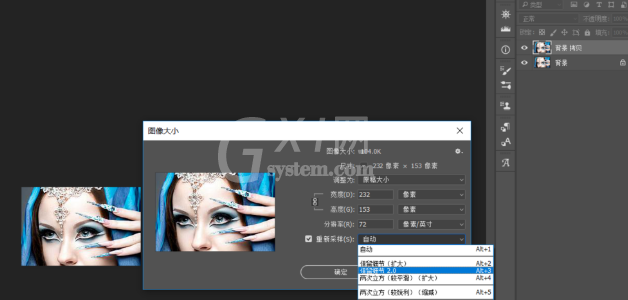
点击菜单栏的图像——图像大小(快捷键alt+ctrl+I),弹出对话框,调整尺寸大小,

勾选“重新采样”,点击下拉按钮,选择“保留细节2.0”,
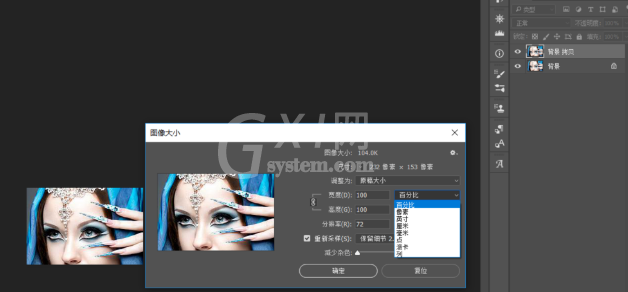
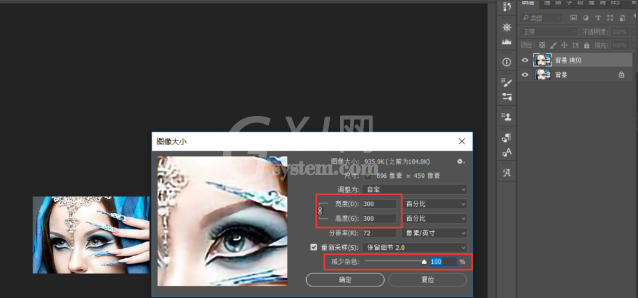
点击宽度和高度下拉按钮,选择单位“百分比”,把参数调为300(数值可自行调整,不是固定值),
把“减少杂色”调整到100%,点击确定即可。
上面就是小编为大家带来的Photoshop无损放大照片的详细操作内容,一起来学习学习吧。相信是可以帮助到一些新用户的。


热门排行
今日推荐


热门手游
-
商场购物模拟器官方版

版本:v1.0.9
大小:46.11MB
日期:2024-12-16
-
滚动方块大冒险免费版

版本:v1.0.5
大小:26.10MB
日期:2024-12-16
-
恋恋奇缘体验服版

版本:v1.0.0
大小:131.33MB
日期:2024-12-16
-
炉石传说官方正版

版本:v1.0
大小:100.52MB
日期:2024-12-16
-
人群大师免费版

版本:v2.15.0
大小:57.68MB
日期:2024-12-16
-
方鸡跳跑单机版

版本:v1
大小:63.49MB
日期:2024-12-16