edius使用遮罩抠像的具体方法
时间:2022-10-26 17:59
最近很多朋友咨询关于edius如何使用遮罩抠像的问题,今天的这篇教程就来聊一聊这个话题,希望可以帮助到有需要的朋友。
edius使用遮罩抠像的具体方法

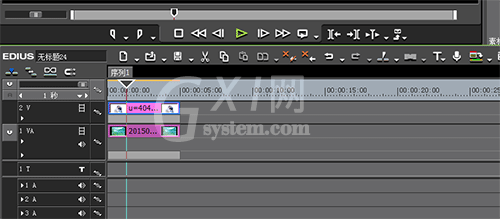
1、首先把需要抠像的素材导入到素材库中,这里再准备一张背景图也导入到素材库中,并把他们摆放到时间线上。如图所示:
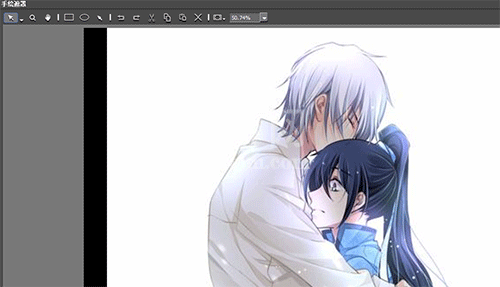
2、打开特效面板,在视频滤镜下面找到“手绘遮罩”,将其拖拽到需要抠像的素材上。在信息面板中找到“手绘遮罩”双击,进入其设置通道,如图所示:
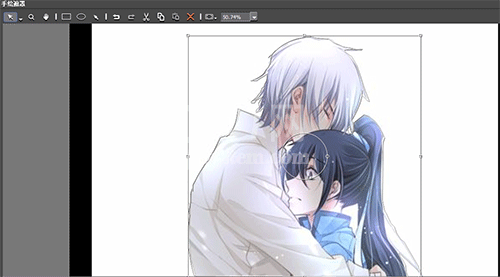
3、在上图的菜单中找到“钢笔工具”使用方法和ps中的方法很像,扣选出人物的闭合窗口,如图所示:
4、扣完人物后,再看窗口右边的菜单,有内部、外部、边缘等菜单。这里是要扣取人物,所以选取“外部”滤镜,直接在其前面的方框内打勾即可。将可见度的数值改成“0”,此时可以点击“功能键”给其加个背景,不加背景也是可以的。如图所示:
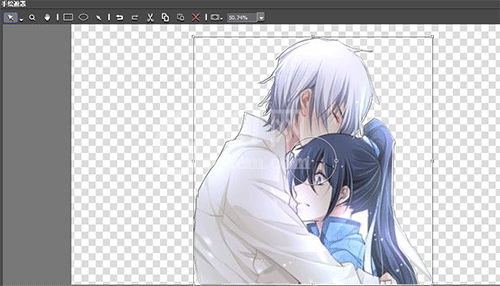
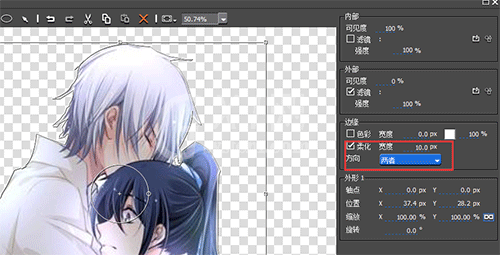
5、观察图片会发现图片扣取的线条太粗枝大叶了,为解决这个问题,还要使用右边菜单中的边缘选项功能。勾选上“柔化”,将其数值改为10PX,方向改为两者。如图所示:
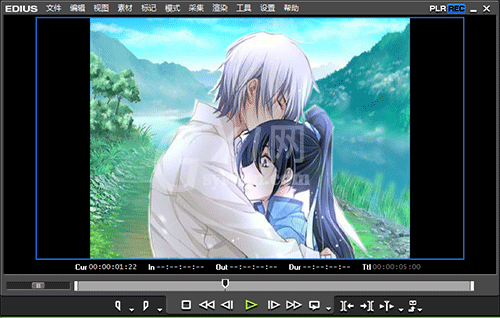
6、点击确定就完成了抠像,最终的结果如图所示:
以上这里为各位分享了edius使用遮罩抠像的具体操作内容。有需要的朋友赶快来看看本篇文章吧。


热门排行
今日推荐


热门手游
-
商场购物模拟器官方版

版本:v1.0.9
大小:46.11MB
日期:2024-12-16
-
滚动方块大冒险免费版

版本:v1.0.5
大小:26.10MB
日期:2024-12-16
-
恋恋奇缘体验服版

版本:v1.0.0
大小:131.33MB
日期:2024-12-16
-
炉石传说官方正版

版本:v1.0
大小:100.52MB
日期:2024-12-16
-
人群大师免费版

版本:v2.15.0
大小:57.68MB
日期:2024-12-16
-
方鸡跳跑单机版

版本:v1
大小:63.49MB
日期:2024-12-16