wps怎么设置立体边框?wps矩形制作圆角立体边框步骤介绍
时间:2022-10-26 21:39
wps软件是一款常用的文档办公工具,那么wps怎么设置立体边框?很多小伙伴还不知道怎么操作,下面小编就为大家带来了wps矩形制作圆角立体边框步骤介绍,感兴趣的小伙伴一起来了解下吧。
wps怎么设置立体边框?wps矩形制作圆角立体边框步骤介绍
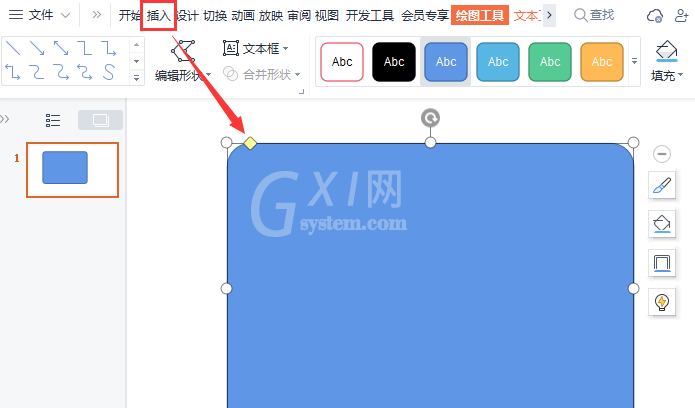
1.打开界面后,点击上方的插入菜单,绘制一个圆角矩形图案
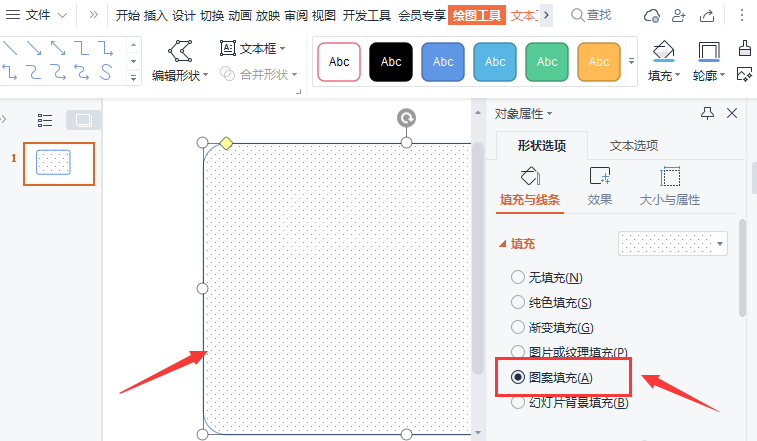
2.为圆角矩形修改图案填充效果
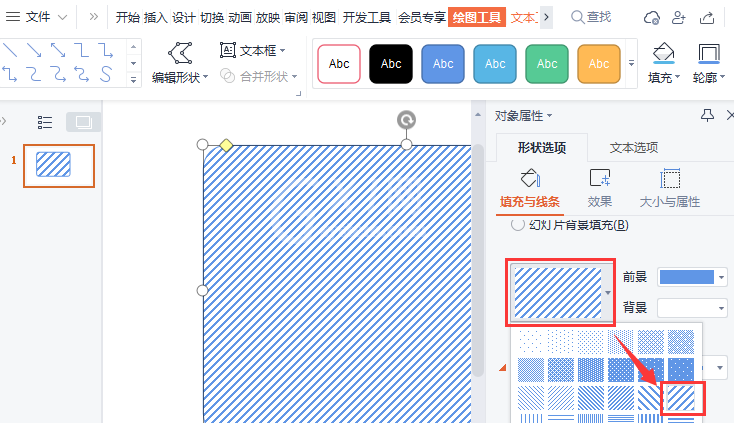
3.随后在填充与线条选项中,选择宽上对角线样式
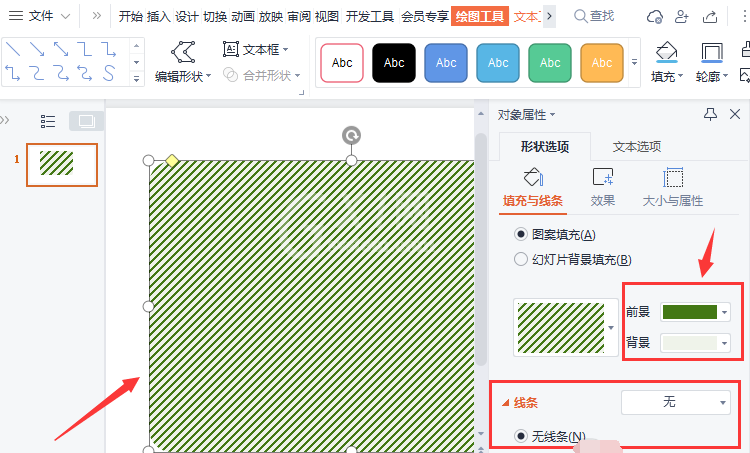
4.将填充的前景、背景颜色依次设置为深绿和浅绿,并把线条设置为无
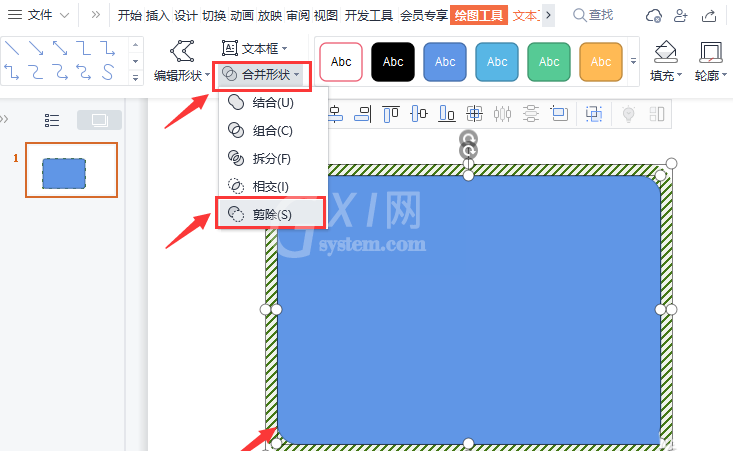
5.在编辑好的圆角矩形内画一个小圆角矩形,同时选中两个圆角矩形,点击合并形状菜单中的剪除按钮
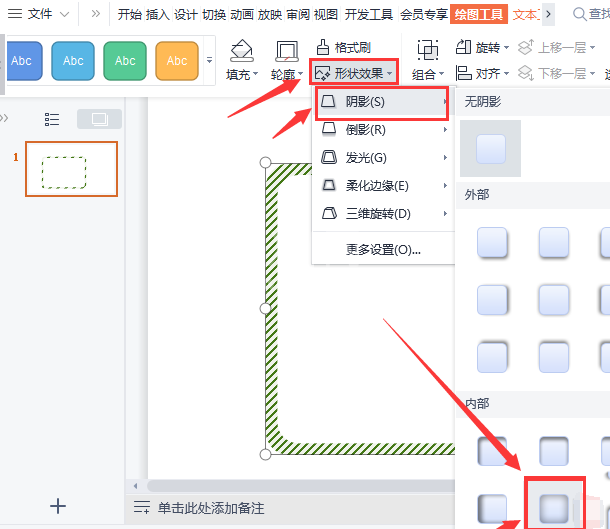
6.最后在形状效果栏目中找到阴影选项,为边框设置内部居中的阴影效果即可完成圆角立体边框的制作
以上就是小编给大家分享的wps矩形制作圆角立体边框步骤介绍,更多精彩内容尽在Gxl网!


热门排行
今日推荐


热门手游
-
商场购物模拟器官方版

版本:v1.0.9
大小:46.11MB
日期:2024-12-16
-
滚动方块大冒险免费版

版本:v1.0.5
大小:26.10MB
日期:2024-12-16
-
恋恋奇缘体验服版

版本:v1.0.0
大小:131.33MB
日期:2024-12-16
-
炉石传说官方正版

版本:v1.0
大小:100.52MB
日期:2024-12-16
-
人群大师免费版

版本:v2.15.0
大小:57.68MB
日期:2024-12-16
-
方鸡跳跑单机版

版本:v1
大小:63.49MB
日期:2024-12-16