如何进行加密访问phpmyadmin
时间:2019-12-13 16:12

首先建议大家检查一下自己是否设置了一系列的安全账号,进入linux系统的命令终端,输入:sudo /opt/lampp/lampp security
然后就会出现一些列的账号设置,大家一路设置下去就行,总体设置如下所示:
XAMPP: Quick security check...
XAMPP: Your XAMPP pages are NOT secured by a password.
XAMPP: Do you want to set a password? [yes] yes (1)
XAMPP: Password: ******
XAMPP: Password (again): ******
XAMPP: Password protection active. Please use 'lampp' as user name!
XAMPP: MySQL is accessable via network.
XAMPP: Normaly that's not recommended. Do you want me to turn it off? [yes] yes
XAMPP: Turned off.
XAMPP: Stopping MySQL...
XAMPP: Starting MySQL...
XAMPP: The MySQL/phpMyAdmin user pma has no password set!!!
XAMPP: Do you want to set a password? [yes] yes
XAMPP: Password: ******
XAMPP: Password (again): ******
XAMPP: Setting new MySQL pma password.
XAMPP: Setting phpMyAdmin's pma password to the new one.
XAMPP: MySQL has no root passwort set!!!
XAMPP: Do you want to set a password? [yes] yes
XAMPP: Write the passworde somewhere down to make sure you won't forget it!!!
XAMPP: Password: ******
XAMPP: Password (again): ******
XAMPP: Setting new MySQL root password.
XAMPP: Setting phpMyAdmin's root password to the new one.
XAMPP: The FTP password for user 'nobody' is still set to 'lampp'.
XAMPP: Do you want to change the password? [yes] yes
XAMPP: Password: ******
XAMPP: Password (again): ******
XAMPP: Reload ProFTPD...
XAMPP: Done.
如果设置完毕之后(最好先重启lampp服务),还是不能通过账号和密码访问phpmyadmin,那么需要修改一个文件。
打开phpMyAdmin根目录下的config.inc.php,按照以下行修改就可以了:
把$cfgServers[$i]['auth_type']= 'config';修改成:
$cfgServers[$i]['auth_type']= 'cookie';
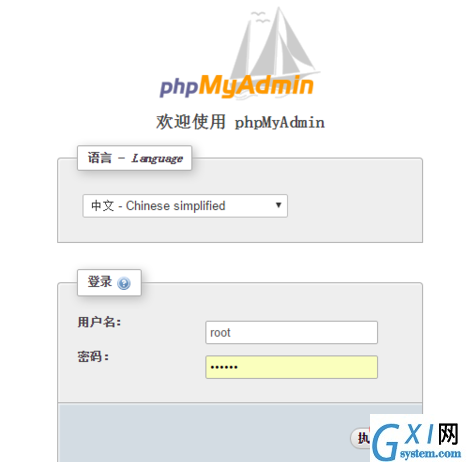
保存文件,重新访问phpmyadmin就可以使用账号的密码了。
如下图所示:

推荐学习:phpmyadmin教程
以上就是如何进行加密访问phpmyadmin的详细内容,更多请关注gxlsystem.com其它相关文章!


