cisco packet tracer开启模拟模式的操作流程
时间:2022-10-26 13:23
很多新手小伙伴还不了解cisco packet tracer开启模拟模式的操作流程,所以下面小编就带来了cisco packet tracer开启模拟模式的操作教程哦。
cisco packet tracer开启模拟模式的操作流程

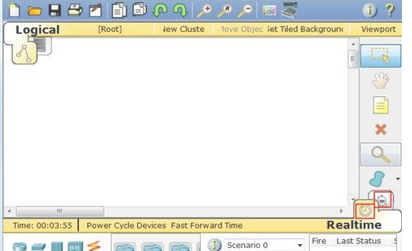
1、打开Cisco Packet Tracer,注意到软件界面的右下角有两个按钮,分别是Realtime mode(实时模式)和Simulation mode(模拟模式)的切换按钮。至于实时模式就不用我介绍了吧。大家都懂。
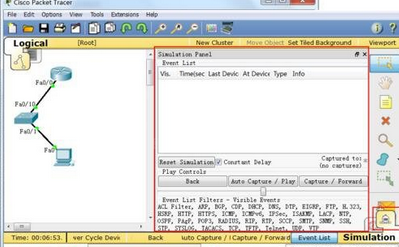
2、点击按钮,切换到模拟模式,这时在界面右边会出现一个操作框。
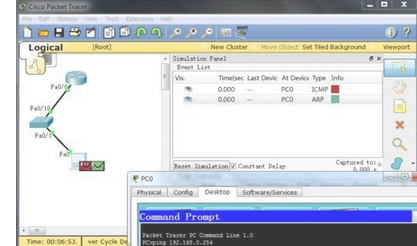
3、我们通过实验来了解具体功能吧:打开pc1的cmd命令窗口,输入ping 192.168.0.254,ping所在网段的路由器。这时候,ping包会停止不动。我们需要在操作窗口点击 Auto Capture / Paly (自动捕获)。
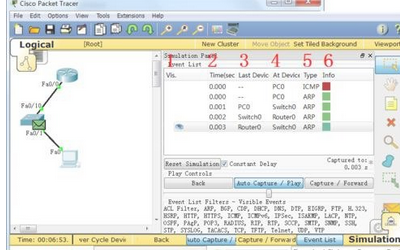
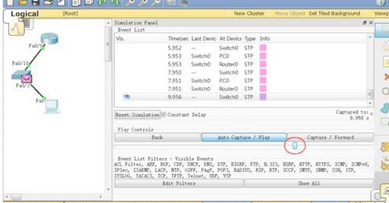
4、现在,你会看到在拓扑图上有一个信封样子的数据包,以动画的形式传输。图中,1中的眼睛表示在图中运动的数据包,2中表示所用时间,3中表示数据包路过的上一个设备,4表示数据包现所在的设备,5中表示数据包类型,6中表示图中数据包的颜色。
5、图中用红色圈圈住的滑块,可以调节数据包传输的快慢。设置速度快点不用等得着急。
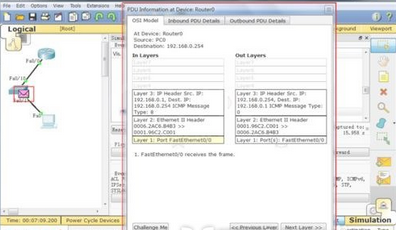
6、双击动画中的数据包,将会弹出一个对话框。我们可以清楚地看到数据包的详细格式,包括源地址,目的地址等详细内容。
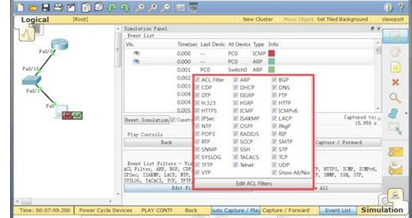
7、点击Edit Filters (编辑过滤器),如果你只是在动画中想看到icmp的数据包,那么只需要勾上icmp。就不会看到其他混淆视线的数据包了。
各位小伙伴们,看完上面的精彩内容,都清楚cisco packet tracer开启模拟模式的操作流程了吧!


热门排行
今日推荐


热门手游
-
商场购物模拟器官方版

版本:v1.0.9
大小:46.11MB
日期:2024-12-16
-
滚动方块大冒险免费版

版本:v1.0.5
大小:26.10MB
日期:2024-12-16
-
恋恋奇缘体验服版

版本:v1.0.0
大小:131.33MB
日期:2024-12-16
-
炉石传说官方正版

版本:v1.0
大小:100.52MB
日期:2024-12-16
-
人群大师免费版

版本:v2.15.0
大小:57.68MB
日期:2024-12-16
-
方鸡跳跑单机版

版本:v1
大小:63.49MB
日期:2024-12-16