ppt为文字加上长阴影效果的图文操作
时间:2022-10-26 13:48
刚接触ppt的朋友可能不清楚为文字加上长阴影效果的操作,今天小编就讲解关于ppt为文字加上长阴影效果的操作方法,相信大家通过学习,在以后的操作中一定会得心应手。
ppt为文字加上长阴影效果的图文操作
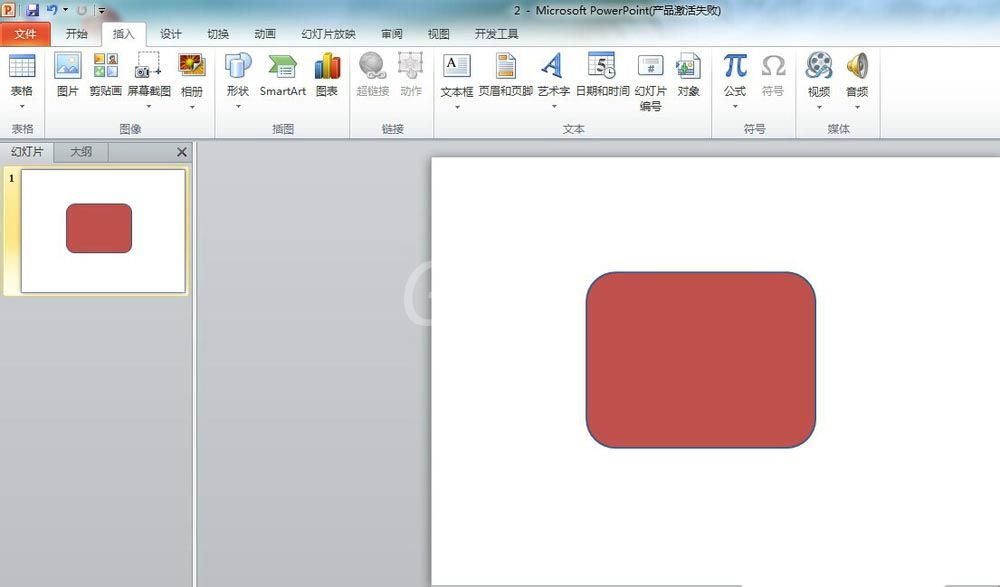
1、新建一个powerpoint,添加一个幻灯片,点击菜单“插入”—“形状”,创建一个圆角矩形,背景填充为红色(这是小编自己选的颜色)。
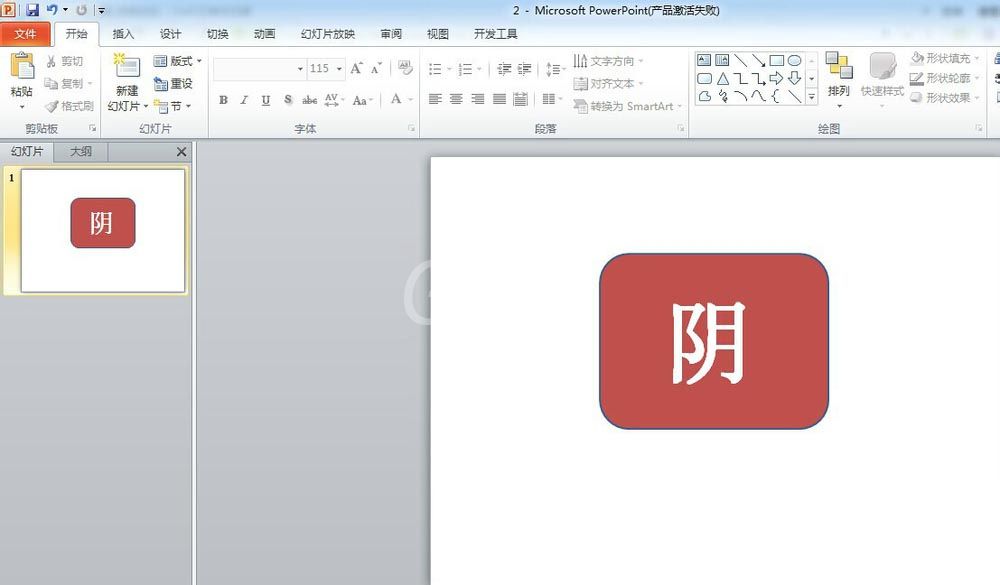
2、点击菜单“插入”—“文本框”,插入文字:阴,设置文字居中,宋体,115号字。
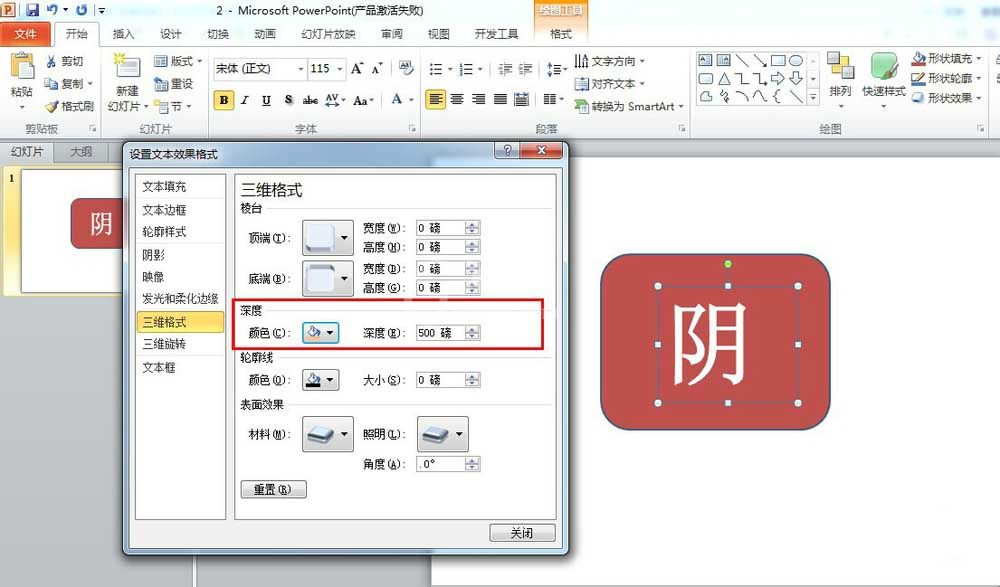
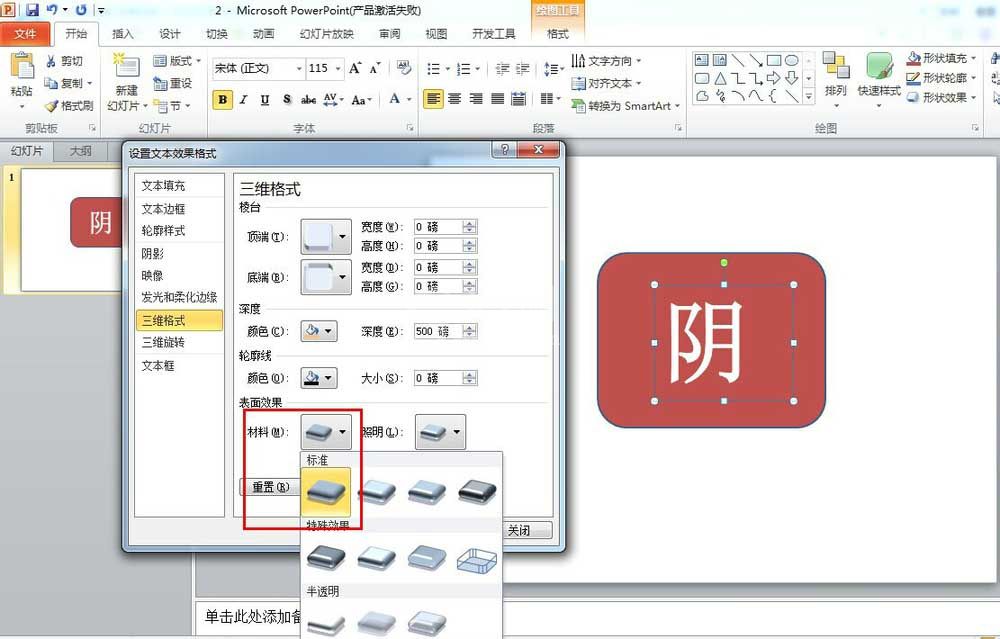
3、选中文字“阴”(在这里一定要全选文字,不能选中文本框),点击右键,选中“设置文字效果格式”,弹出窗口后选中“三维格式”,将深度调为500,颜色选为橙色。
4、在“设置文字效果格式”窗口选中“三维格式”,将材料选为“亚光”。
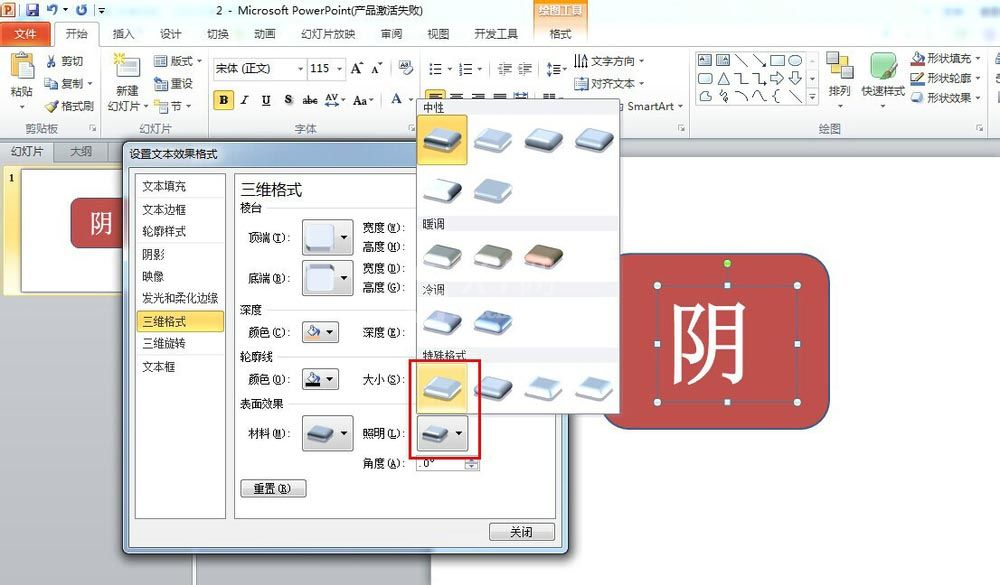
5、在“设置文字效果格式”窗口选中“三维格式”,将照明选为“平面”。
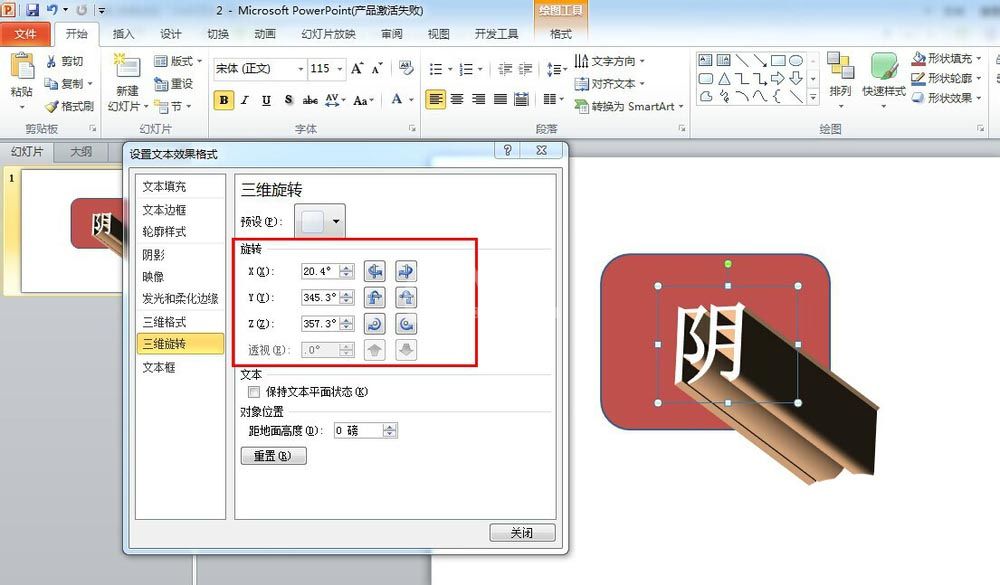
6、在“设置文字效果格式”窗口选中“三维旋转”,将旋转角度设为右下角。
7、将文字‘阴“复制,黏贴为图片形式,将图片与原文字重合,删除原文字。
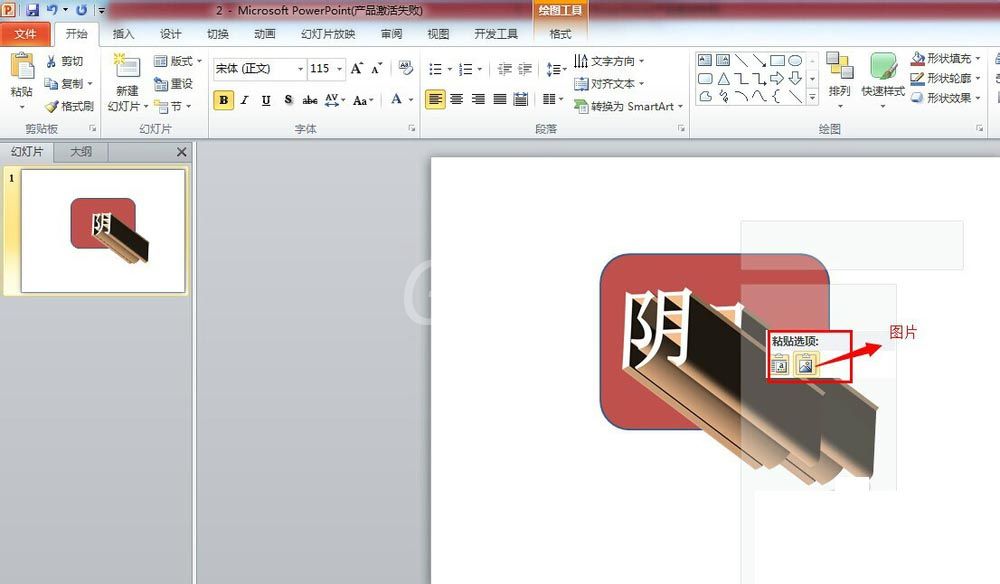
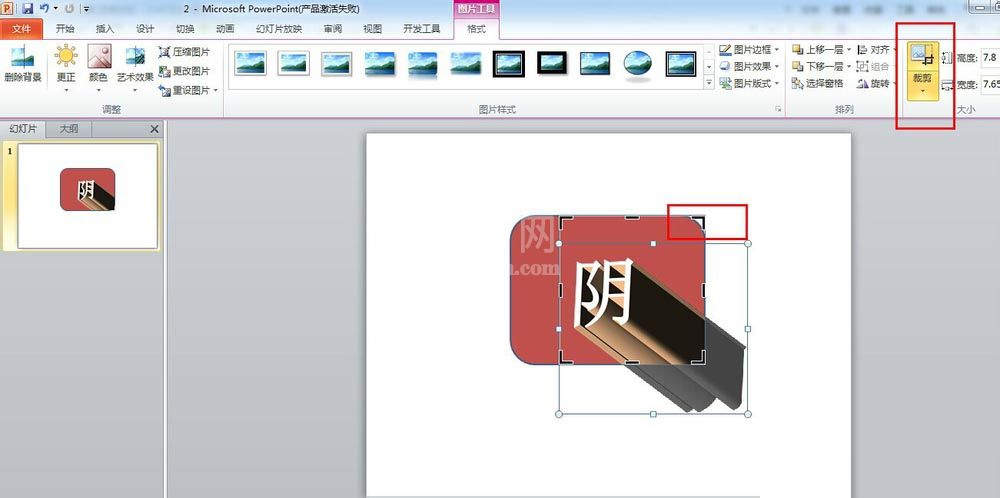
8、点击文字图片,选择菜单“格式”—“剪裁”,注意剪裁是要用圆角矩形。将超出圆角矩形的部分剪裁了就完成了。
各位小伙伴们,看完上面的精彩内容,都清楚ppt为文字加上长阴影效果的图文操作了吧!


热门排行
今日推荐


热门手游
-
商场购物模拟器官方版

版本:v1.0.9
大小:46.11MB
日期:2024-12-16
-
滚动方块大冒险免费版

版本:v1.0.5
大小:26.10MB
日期:2024-12-16
-
恋恋奇缘体验服版

版本:v1.0.0
大小:131.33MB
日期:2024-12-16
-
炉石传说官方正版

版本:v1.0
大小:100.52MB
日期:2024-12-16
-
人群大师免费版

版本:v2.15.0
大小:57.68MB
日期:2024-12-16
-
方鸡跳跑单机版

版本:v1
大小:63.49MB
日期:2024-12-16