Google Picasa使用导入来源功能的操作内容
时间:2022-10-26 16:52
一些亲们可能还不知道Google Picasa使用导入来源功能的操作,为了让大家更好的使用此功能,下文专门讲述了Google Picasa使用导入来源功能的操作内容,希望对你们有所帮助哦。
Google Picasa使用导入来源功能的操作内容
打开Google Picasa软件
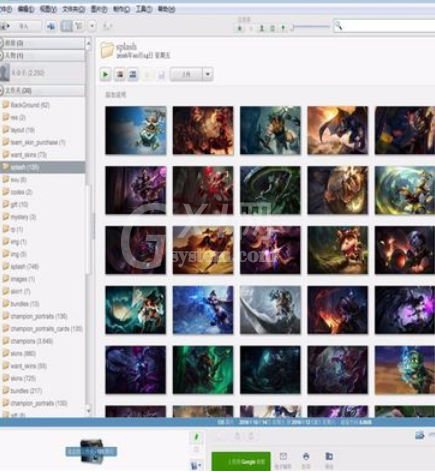
打开Picasa图片查看和编辑软件,进入到Picasa的主界面,进行相关的操作,非常好用。
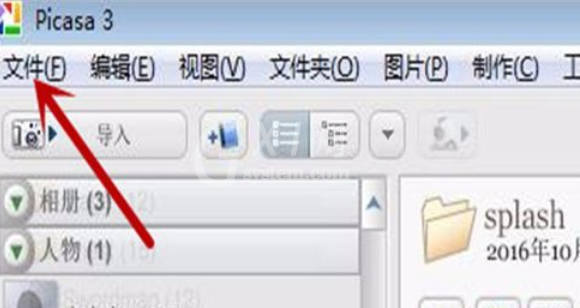
然后点击Picasa左上角的“文件”按钮,还可以使用快捷键Alt+F打开,还是非常简单的,
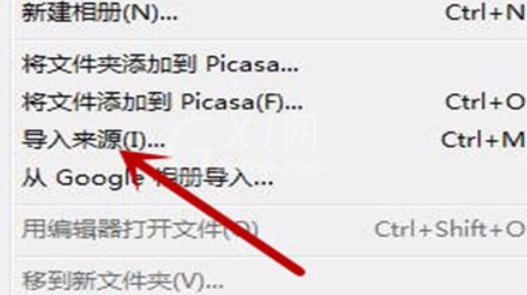
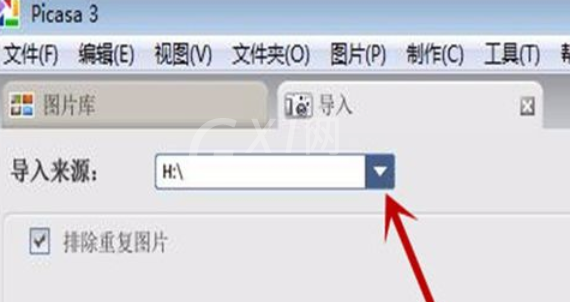
接着在弹出来的选项卡中点击“导入来源”选项,可以将与电脑连接的存储设备的图片等,导入到需要的地方
这时进入到导入来源的主界面,点击如图的下拉列表,进行选择
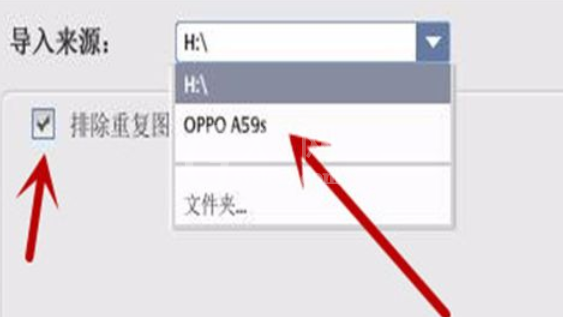
再选择好来源的存储设备,选中即可,最后勾选旁边的“删除重复图片”选项,以免重复的图片太多,影响我们操作
在导入来源界面的左下角点击导入目标的下拉列表,选择导入地方
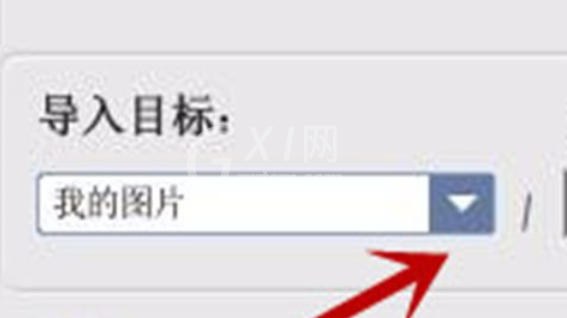
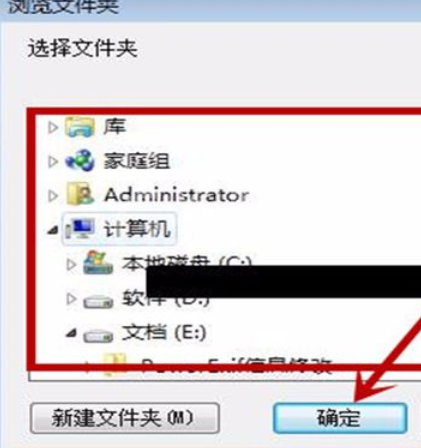
还可以选择一个其他位置导入,如图选择好位置,点击“确定”即可设置成功。
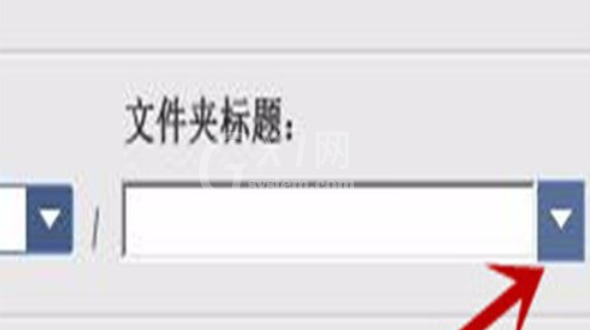
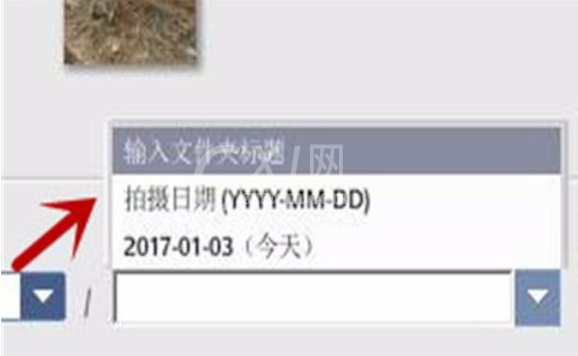
然后我们点击刚才那个选项边上的选项下拉列表,选择文件夹标题或输入,以便我们可以快速的找到导入的图片。
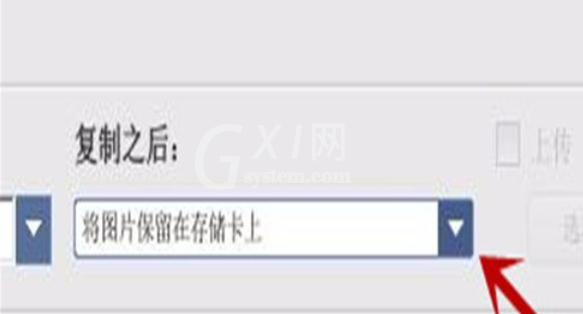
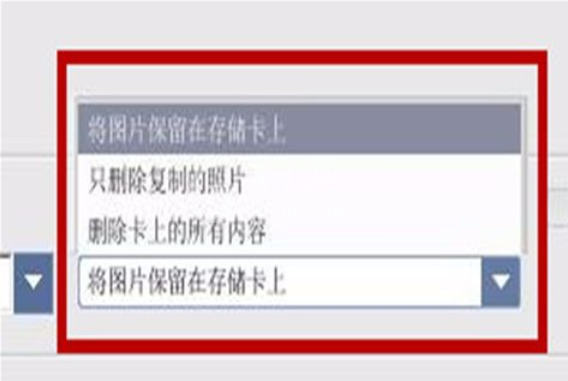
再在之前那个选项的右侧点击复制之后的下拉列表,选择复制之后默认的操作,分别是将图片保留在存储卡上、只删除复制的图片、删除卡上的内容、其中一个即可。
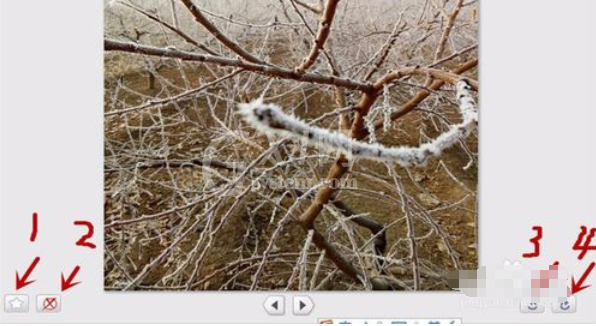
如图在右侧可以选择图片先进行编辑,1是添加或删除星标、2删除/包含、3左旋转、4右旋转,我们根据需要将图片调整成合适的样式,再导入进去,这样以后查看也方便些。
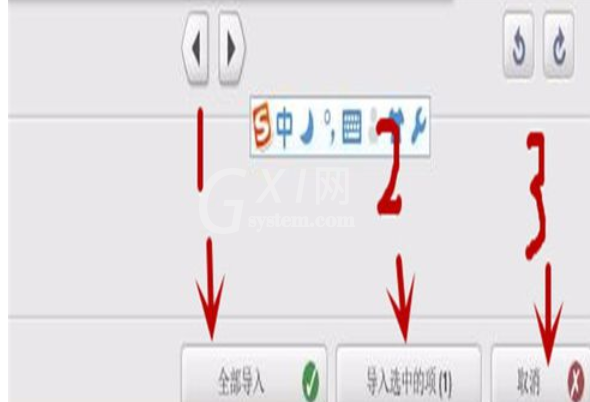
都准备好后,在右侧下方,点击1的全部导入,即可将全部图片导入到所在位置,点击2的导入选中项,即可根据选项导入,点击3的取消,即可取消导入,根据自己的需要进行操作即可
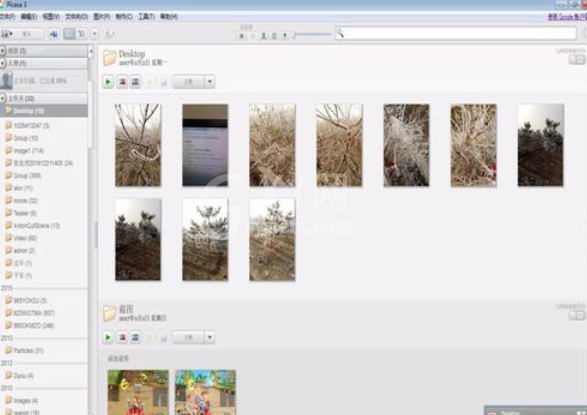
最后一步我们可以用Picasa,查看导入位置的图片,如图所示
以上这里为各位分享了Google Picasa使用导入来源功能的操作内容。有需要的朋友赶快来看看本篇文章吧。


热门排行
今日推荐


热门手游
-
商场购物模拟器官方版

版本:v1.0.9
大小:46.11MB
日期:2024-12-16
-
滚动方块大冒险免费版

版本:v1.0.5
大小:26.10MB
日期:2024-12-16
-
恋恋奇缘体验服版

版本:v1.0.0
大小:131.33MB
日期:2024-12-16
-
炉石传说官方正版

版本:v1.0
大小:100.52MB
日期:2024-12-16
-
人群大师免费版

版本:v2.15.0
大小:57.68MB
日期:2024-12-16
-
方鸡跳跑单机版

版本:v1
大小:63.49MB
日期:2024-12-16