AutoCAD2019安装的具体步骤
时间:2022-10-26 17:16
亲们想要安装AutoCAD2019,可能还不清楚安装方法,下面就分享一下AutoCAD2019安装的具体步骤,希望能帮到大家。
AutoCAD2019安装的具体步骤

1、打开安装程序,出现安装界面,点击“安装”;

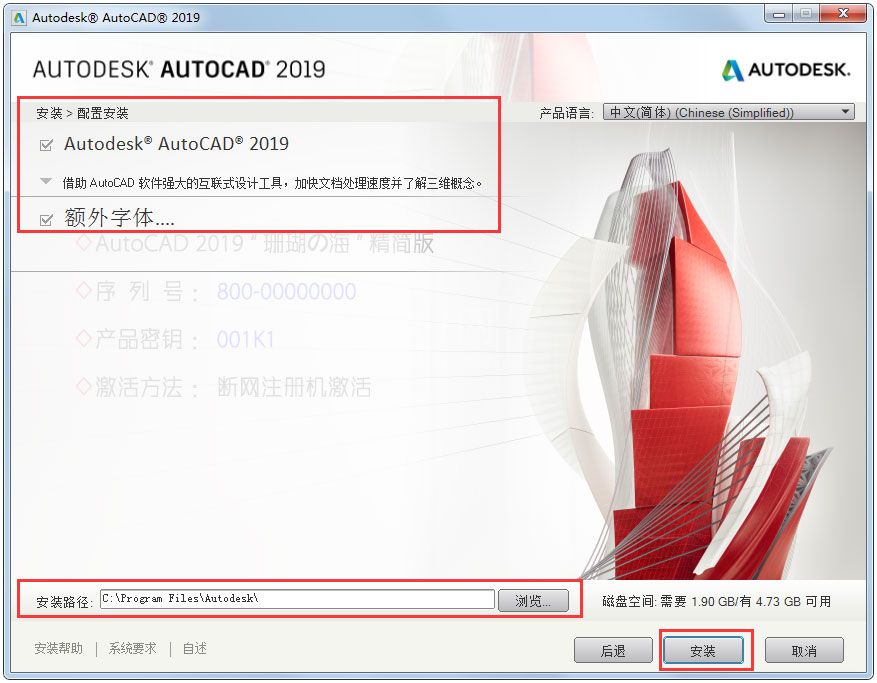
2、选择软件的安装组件和安装路径,由于软件数据体积比较大,建议不要现在C盘,然后点击“安装”;
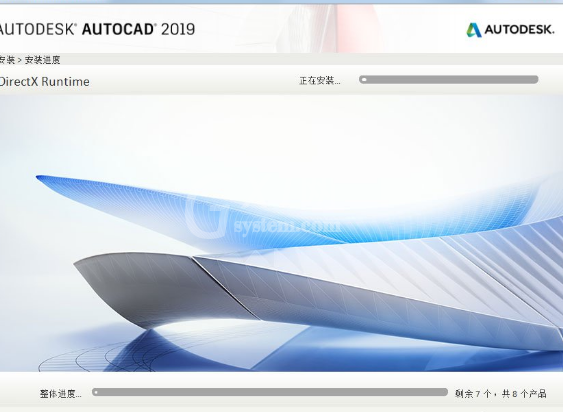
3、安装需要比较长的一段时间,请耐心等待;
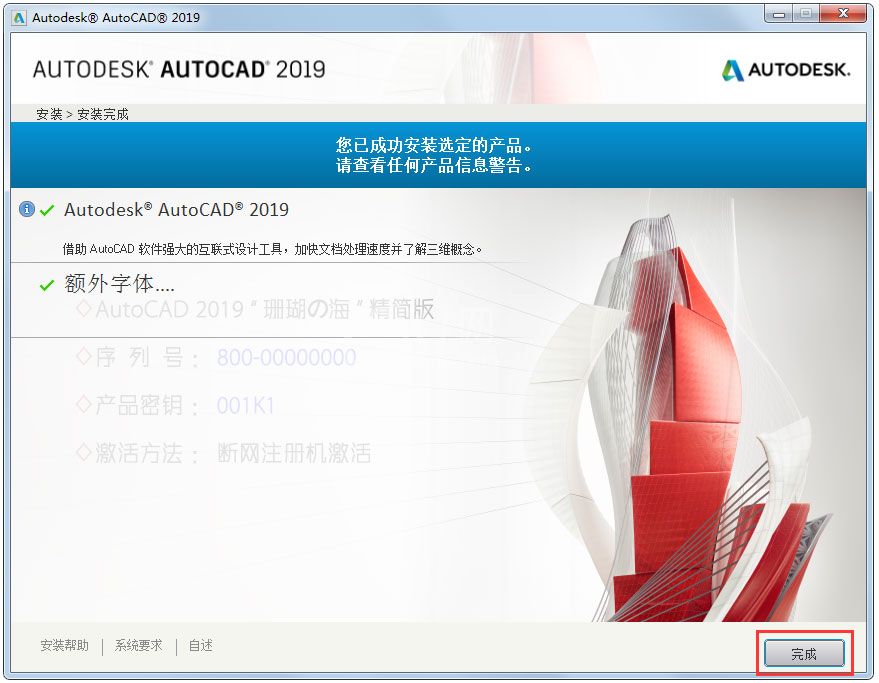
4、软件安装完成,点击完成;
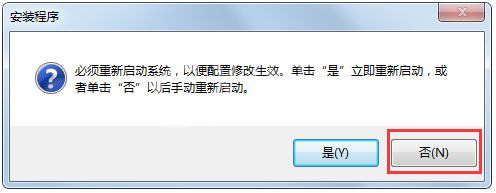
5、然后软件会提示重启,无需重启,点击“否”即可。
以上就是AutoCAD2019安装的具体步骤,希望大家喜欢。


热门排行
今日推荐


热门手游
-
商场购物模拟器官方版

版本:v1.0.9
大小:46.11MB
日期:2024-12-16
-
滚动方块大冒险免费版

版本:v1.0.5
大小:26.10MB
日期:2024-12-16
-
恋恋奇缘体验服版

版本:v1.0.0
大小:131.33MB
日期:2024-12-16
-
炉石传说官方正版

版本:v1.0
大小:100.52MB
日期:2024-12-16
-
人群大师免费版

版本:v2.15.0
大小:57.68MB
日期:2024-12-16
-
方鸡跳跑单机版

版本:v1
大小:63.49MB
日期:2024-12-16